In 2020, it’s easier than ever to start a blog – even if you are a complete beginner who doesn’t understand anything about coding or web design.
With a little bit of guidance and the right tools, you can have your very own personal or professional blog up and running in less than 30-minutes.
Writing blog posts and content can take much longer, though.
In this step-by-step guide we’ll walk you through every part of the process while helping you avoid the common mistakes new bloggers tend to do.
Sounds good? Then let’s dive in and get started.
Step 1: Choose your blog topic
Step 2: Find the right blogging platform (WordPress)
Step 3: Set up your blog through web hosting
Step 4: Configure your blog
Step 5: Design your blog by choosing a theme
Step 6: Add logo, change colours and structure
Step 7: Add/Write new blog posts and pages
Step 2: Find the right blogging platform (WordPress)
Step 3: Set up your blog through web hosting
Step 4: Configure your blog
Step 5: Design your blog by choosing a theme
Step 6: Add logo, change colours and structure
Step 7: Add/Write new blog posts and pages
Time to set up a blog: 30-40 minutes
Time to customize a blog: 1-2 hours
Guide difficulty: Beginners
Time to customize a blog: 1-2 hours
Guide difficulty: Beginners
If you get stuck following this step-by-step guide, you can contact us and we’ll help you out.
STEP 1 – Choose your blog topic
The very first thing you need to do is choose a topic for your blog.
Most successful blogs focus on one thing. May it be food, travel, fitness, fashion or simply about your business.
We recommend choosing a topic that you feel passionate about or interested in. It’s even better when you are an expert at something, this helps you to grow your blog through writing good, quality content to help others.
Tips for choosing a blog topic:
- are you an expert in something?
- are you passionate about something?
- are you learning something new and want to write about your process?
Here’s an example: If you are highly interested in fitness and you like to train, it’s wise to share your wisdom in a blog that is related to fitness or cover topics on training and nutrition. Through the blog, you’ll be able to get new clients.
You don’t need to choose your blog topic right away, but it’s good if you already have something in mind.
STEP 2 – Find the right blogging platform
First, decide – free blog or self-hosted blog?
Anyone can sign up with a free blogging site or platofrm such as Blogger.com, WordPress.com and Tumblr.com
However, if you are serious about blogging, the free blogging platform is not a way to go.
There are many cons and downsides of a free blogging service (limited monetization, customization and traffic), but most importantly – you’ll have no control over your blog.
And if you want to upgrade, you’ll need to pay more than you should.
The solution for this is to host your blog yourself (have a self-hosted blog).
In that way you’ll have no limitations related to your blog content (such as images and videos). Your blog will look more professional, better looking and can be improved later on. Plus, you actually own your blog.
Of course, if you don’t plan to blog for more than a few weeks, a free blog might make sense. In every other case, we recommend the self-hosted route.
Which blogging platform should I choose?
There many different blogging platforms that you can choose from. Some are more flexible and easier to use, while some are more limited and come with a higher learning curve.
Most recent statistics show that WordPress which is a free (open-source) blog platform is the most commonly used blogging platform in 2020.
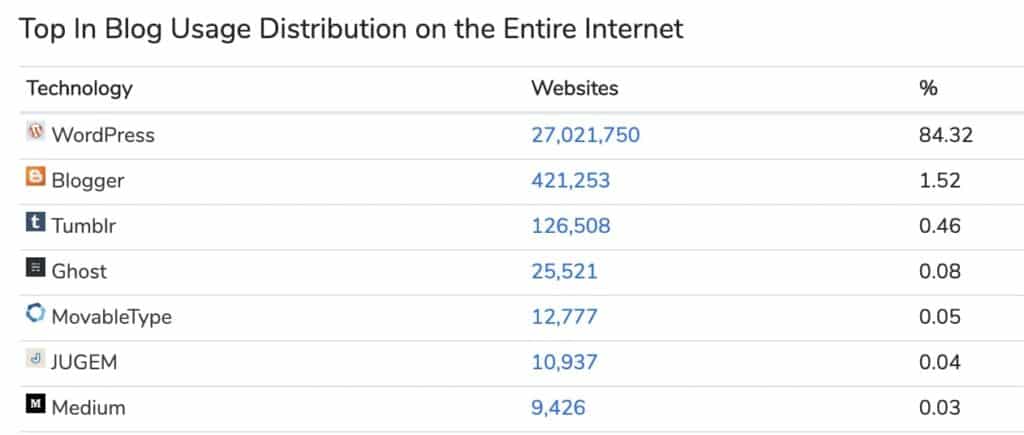
Data from: https://trends.builtwith.com/cms/blog/traffic/Entire-Internet
WordPress is followed by Blogger, Tumblr, Ghost, and Medium.
We’ve tried dozens of different blogging platforms, but none of them match WordPress.
Here’s why self-hosted WordPress is likely your best option:
- It’s free to use (open-source)
- It’s very flexible with hundreds of free (and premium) blog themes
- It has a large developer community
- WordPress is being updated and improved regularly
- You will have full control over your blog
How much will it cost to self-host my WordPress blog?
Luckily, not much! All you need is:
- Domain name – your own web address, such as www.YourBlogName.com which is around $10/year, but we’ll show you how to get one for free later in this guide.
- Web hosting – service to host your blog. Simple and reliable web hosting is usually around $4/mo.
In total, it’s around ~$60/year, but it’s an important investment to your blog success.
If you think that blogging is not for you, you can always cancel the hosting service and many providers offer 30 days money-back guarantee. Domain names can’t be refunded, but they will simply expire and become available once you stop paying for it.
We recommend going with the self-hosted route because it’s much more flexible and you can start growing and creating your blog from day one.
STEP 3 – Set up your blog through web hosting (and register domain name)
Full disclosure: WebsiteSetup is affiliated with Bluehost and earns a commission if you decide to make a purchase through our links. Thanks for your support.
To get started with a self-hosted WordPress blog, you’ll be going to need a domain name and web hosting.
We’ve been recommending Bluehost as a blog/web hosting and domain registrar for years.
From Bluehost, you will get (account gets activated instantly):
- Custom domain name (free for the 1st year), with SSL certificate (security).
- Website hosting ($2.75/mo+)
- Simple, one-click install for WordPress
- Free email accounts, like
your.name@yourdomain.com
Of course, you don’t need to use Bluehost, especially when you already have a web host.
Whichever hosting company you choose, make sure it has “one click installs” for blogging platforms such as WordPress. This will make your set up process much easier.
If you get stuck registering a domain name and signing up for Bluehost, below is a quick step-by-step guide that I made.
Registering a domain name and choosing a web hosting plan on Bluehost (EXPANDS)Install WordPress
Once you have signed up with Bluehost, you’re able to install your WordPress blog.
Don’t worry, most web hosting companies offer one click install for WordPress blogging platform, so it should be very easy.
Here’s what you do exactly to get to install WordPress on Bluehost
- Log in to your user profile at Bluehost.
- In the “Home” page click on the blue button “WordPress”
- WordPress installation starts
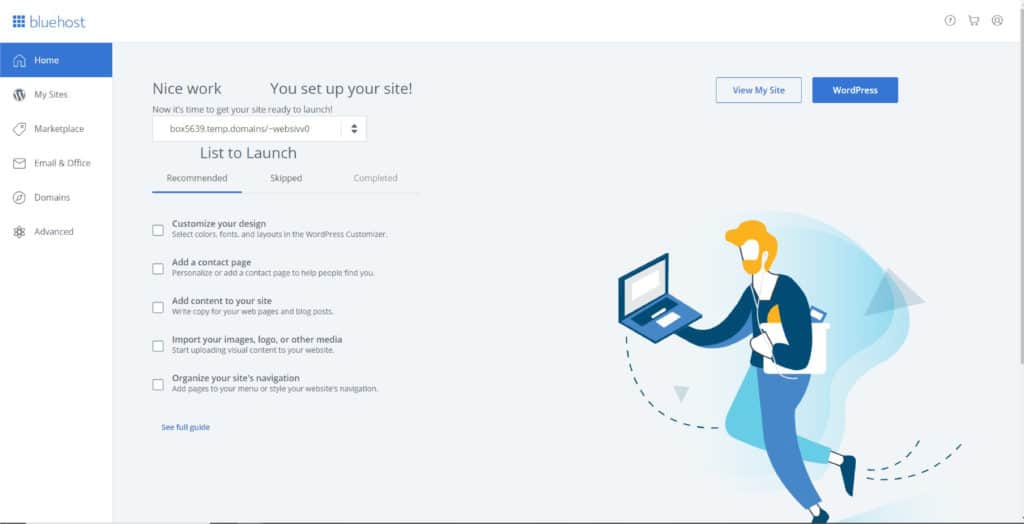
We should note that your domain name activation might take 10 to 15 minutes, so don’t freak out about the weird looking temporary domain name.
Bluehost will allow you to choose your admin login and password for WordPress when it’s done installing.
Experiencing any difficulties with this installation process? Read our other guide on installing WordPress on Bluehost.
If you are using a web hosting service, that doesn’t offer an automatic or a quick install for WordPress, read this manual installation guide.
STEP 4 – Configure your WordPress blog
Once you have your admin account for WordPress all set up (the previous step), you can proceed to visit your new dashboard:
Just go to
yourdomain.com/wp-admin and input the access details for your admin account. Once you log in, you’ll see this: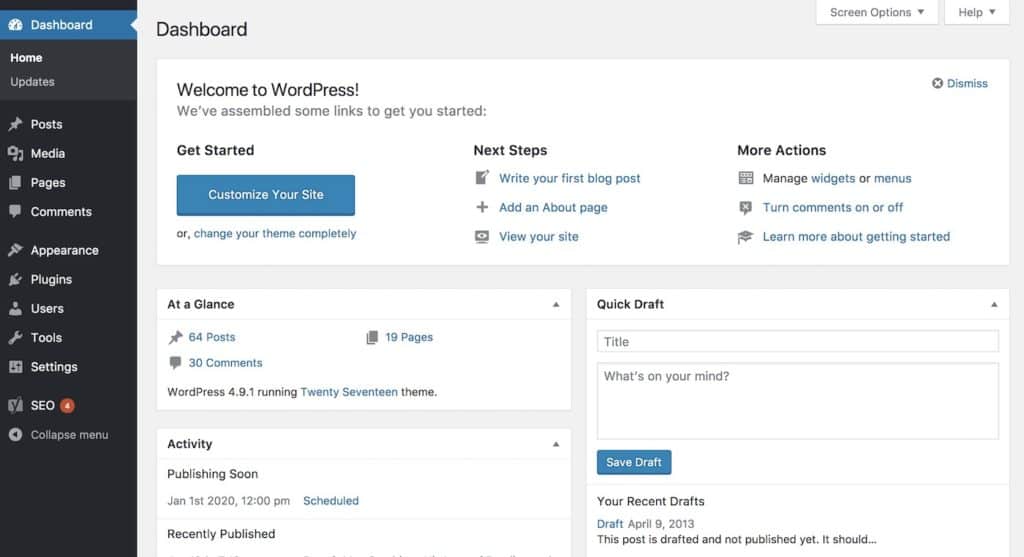
Even though WordPress is already 100% operational, there are still some settings that you should go through:
1. General Settings
Start by going to the left sidebar and clicking on Settings → General.
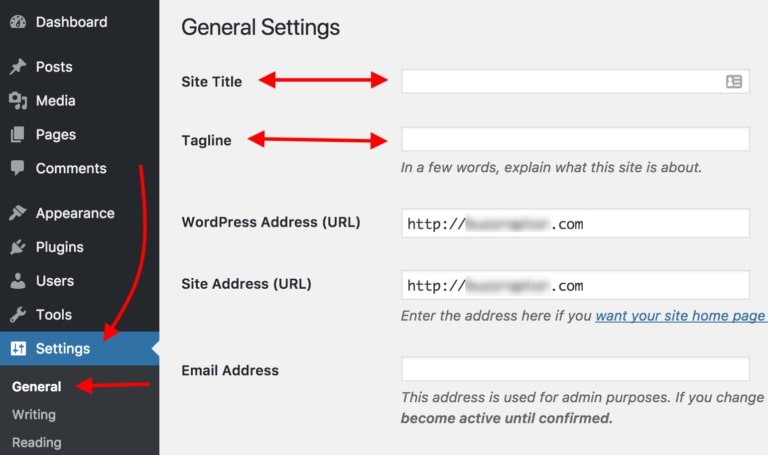
This is where you can set:
- “Site Title” – effectively the name of your site. The title is particularly important since it’s what every visitor sees first, and also a big part of how search engines determine your rankings. Make sure that you have your business name there.
- “Tagline” – think of it as the summary of what your blog is about, in one short sentence. For example: “Recipes that even a beginner cook can handle.”
In this section, you can also check if your blog address (URL) is in order, set the timezone you’re in and your preferred language.
Another important thing to note is that Bluehost has a Coming Soon feature in the last section of General Settings. Once you’re ready to go live with your blog make sure to turn this feature off.

2. Visibility in Google
The next, super-important thing that you must do is make sure that search engines such as Google can index your new blog.
To do that, go to Settings → Reading (again, from the main sidebar) and make sure that the field labeled “Discourage search engines from indexing this site” remains unchecked. Like so:
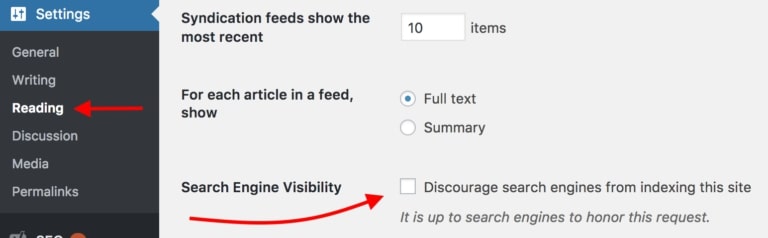
If you don’t do that, your blog might end up literally invisible to Google.
3. Permalinks
The “permalinks” settings define how WordPress will go about creating individual URLs – webpage addresses – for each of your individual blog posts or sub-pages. Though the idea might sound a bit advanced, setting this is very simple.
Just go to Settings → Permalinks. Once there, set your permalinks to the “Post name” variant, like so:
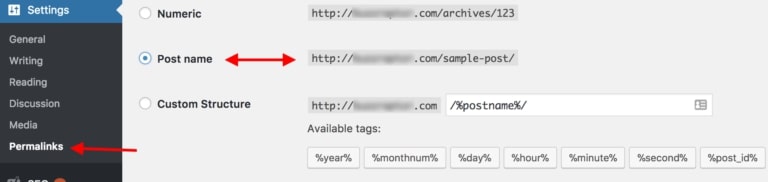
This is the most optimal setting of the ones available and also the one preferred by Google and other search engines.
STEP 5 – Design your blog by choosing a theme
Another great thing about WordPress is that even though you might not be a skilled designer yourself, you can still get a top-shelf look for your blog.
How? Thanks to thousands of WordPress themes that are available out there on the web. Best of all, many of them are free, and you can customize them easily (without any coding knowledge).
Go back to your WordPress dashboard and navigate to Appearance → Themes. Once there, click on “Add New”:
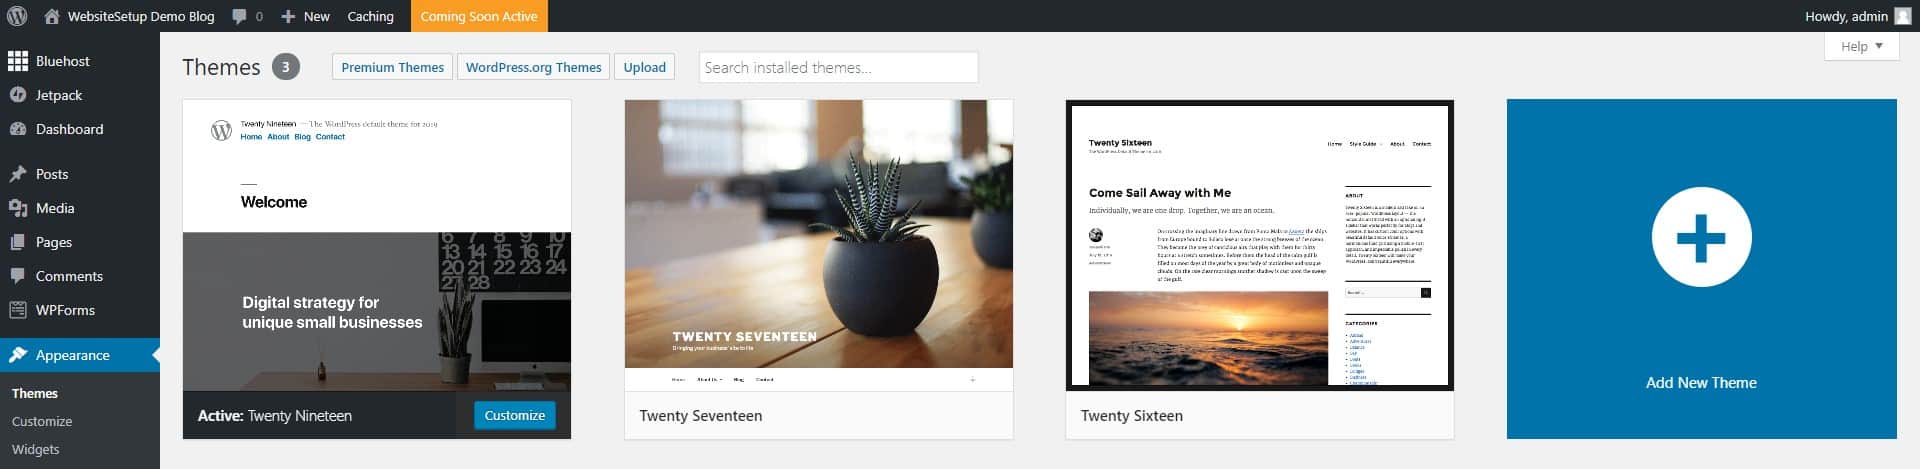
Then, switch the tab to “Popular”:
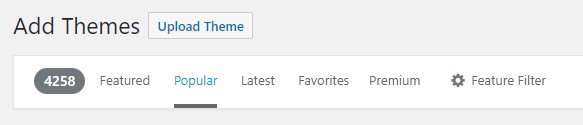
What you’re going to see are the most popular free WordPress themes in the market. And the best part is that you can install any of them with just one click.
Go ahead and spend a while browsing through this list to find something that really suits your business and the main purpose behind your new blog.
Once you do see a theme you like, you can get it installed onto your blog by clicking on “install” next to the theme’s name, followed by “activate”.
Note: What you’re doing here is just changing the look of your blog. You’re not erasing any of your content. You can change your themes as often as you want, without having to worry about your pages vanishing.
STEP 6 – Add logo, change colours and structure
Even though the WordPress theme that you’ve decided to use already comes with its specific pre-configured design, you can still change parts of it to your liking.
This is all done if you go to Appearance → Customize. What you’ll see is the WordPress Customizer:
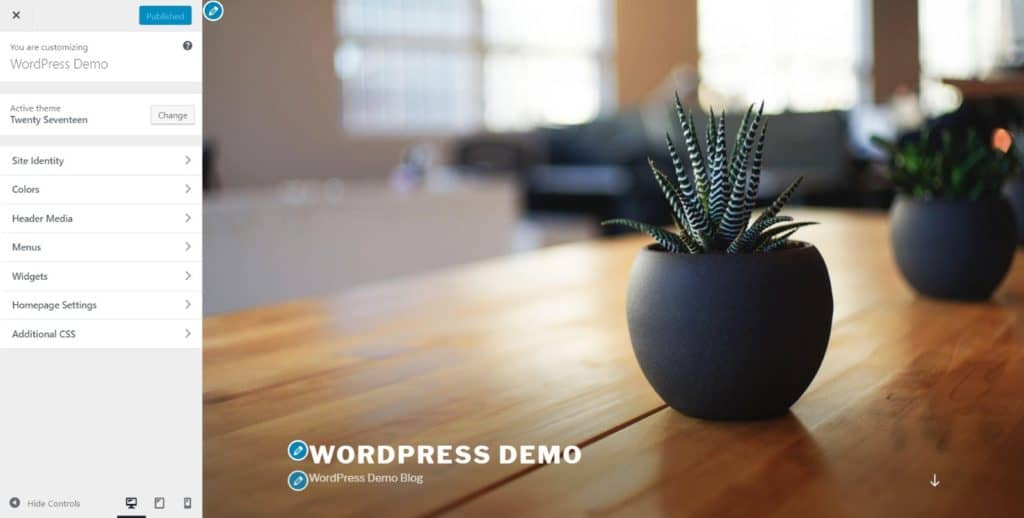
Depending on your current theme, you’ll get a different set of options in the sidebar menu, but the most common ones will include:
- “Site Identity” – this is where you can set your blog title again, plus add a logo image and a site icon (aka. favicon).
- “Colors” – for adjusting the basic colors used throughout the design.
- “Header” – for setting your header graphic or image.
- “Background” – for setting your background graphic, image, or color.
- “Menus” – more on this later on.
- “Widgets” – more on this later on as well.
- And other, theme-dependent settings.
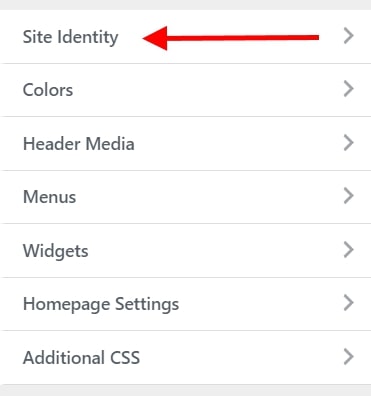
Let’s start with the first option:
1. Add Logo And Favicon
- If you don’t have a logo yet, you can use these free tools to create one.
- If you don’t have a favicon yet, you can use these favicon generators.
Since you probably already have your site title and tagline set up, what you’re going to be doing here is adding your company logo and favicon. Both are quite easy to do:
To add your logo, just click on the “Select logo” button. On the next screen, WordPress will let you know what sort of graphics are acceptable for logos.
After uploading your logo, you should see it inside the live preview window.
To add your favicon, click on the button labeled “Select image” under the “Site Icon” section:
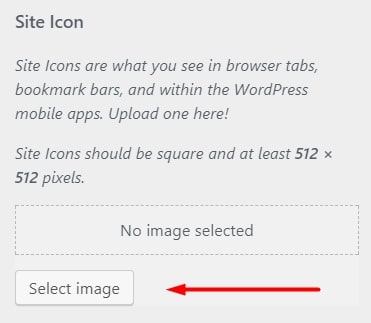
The process is quite similar here as well – WordPress will tell you what sort of an image it’s expecting. However, the thing that’s different here is that once you do add your favicon, it won’t actually get displayed anywhere in the preview. To see it, look at the main top bar of your web browser, next to the blog title. An example from this site:

2. Change Blog Colors
Depending on the theme you’re using, you will see a different set of options in this section of Customizer. Here’s an example from the default theme:
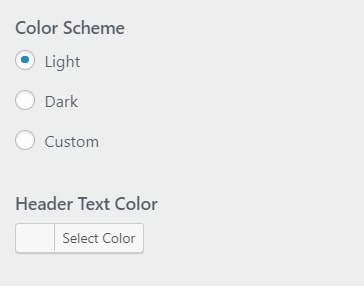
Just a couple of settings here, granted, but playing with these can still help you make your new blog look unique and more in tune with your brand.
3. Add Custom Header Graphic
This is another section that’s highly dependent on the theme that you’re using. Though, the most common setting that you’ll stumble upon is the ability to add a header graphic/image, or perhaps even a header video. To set your header image, just click on “Add new image”:
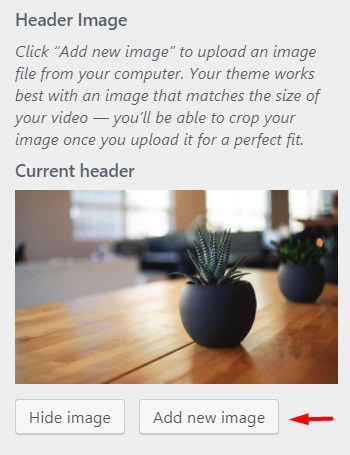
You can pick basically whatever image you wish for your site header, as long as it’s of sufficiently high quality. WordPress will let you know about the minimal requirements for your header image right on the upload screen.
4. Change Background
Some themes come with the ability to set the main background for your whole website.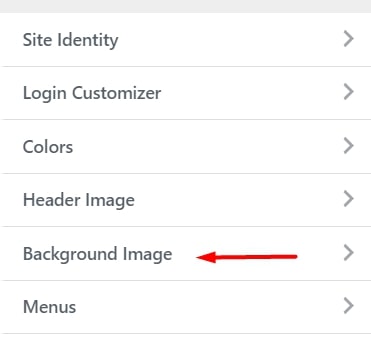
Most commonly, these options will allow you to set a custom image or a solid color to be in the background. Either way, you can get quite interesting effects if you experiment with this long enough.
STEP 7 – Add/Write new blog posts and pages
With all of the above already done, you’re ready to start creating content for your new blog.
If you are building a blog, you’ll likely need at least some of the following pages:
- Blog – this one section WordPress creates for you automatically. By default, all your latest blog posts are going to be listed right on the homepage.
- About – to tell your visitors what the blog is about and who’s behind it.
- Contact – to let people contact you directly.
- Services / Products – to list your products and/or services and tell people why they should buy them.
- Testimonials – from your previous customers.
- Portfolio – your body of work presented in an attractive way.
1. Create New Pages
Now that you have an idea of what sort of pages you might need, let’s talk about how to actually go about creating them.
Luckily, the process of creating a new page in WordPress is the same no matter what sort of page that is.
Before doing so, you can also set your blog to a maintenance mode, which will prevent others from seeing your unfinished website.
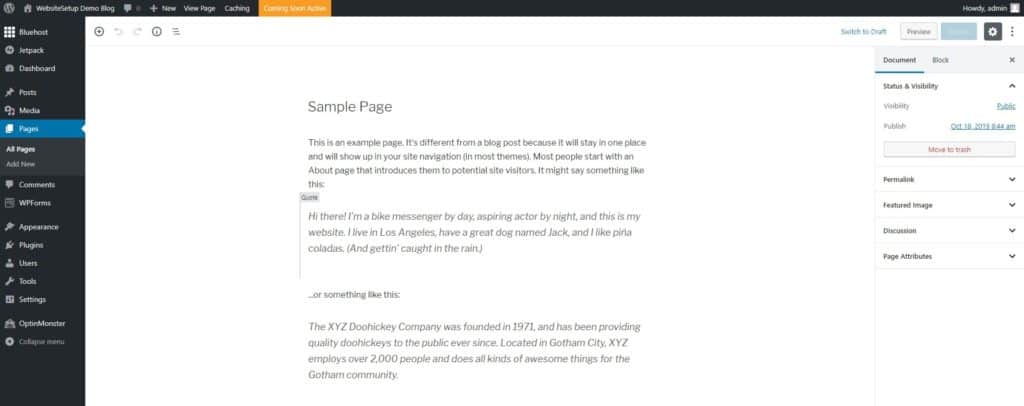
To do that, go to your WordPress dashboard and then to Pages → Add New. What you’ll see is the main page editing screen of WordPress:
Here is a great overview of how adding posts and pages works on WordPress.
As you would imagine, once you click the “Publish” button, your page becomes visible to the public.
2. Add Blog Posts
The blog functionality is one of the core elements of the WordPress CMS. That’s why WordPress has a whole separate section devoted to creating and publishing blog posts.
You can find it if you go to Posts from the main WordPress dashboard sidebar:
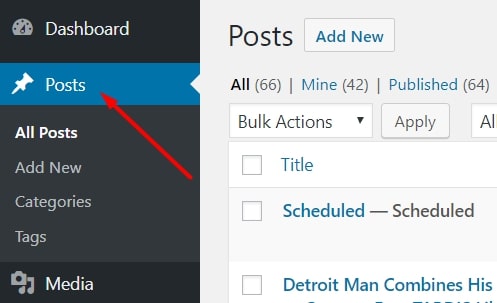
Creating new posts works exactly the same as creating new pages. The only difference is that your posts are going to be displayed automatically on your homepage, while your pages need to be added to a menu if you want anyone to find them.
3. Add Navigation Menu
Menus have a very special task in WordPress. Basically, they are your best tool for making sure that the pages you’ve created can be found by your readers.
Typically, your blog should have one main menu that’s placed in the main navigation bar. Most visitors will expect to find something like that on your site.
To create a new menu, go to Appearance → Menus. Once there, look through the list of the available pages (the pages you’ve created so far) and click the checkboxes next to the ones that you want to have in your new menu. Then, click on “Add to Menu”. You’ll see your pages listed in the section on the right.

At this stage, you can also drag-and-drop those pages to realign them. When you’re done, you can also select one of the checkboxes under “Display location” (see below). Most commonly, your main navigation location should be listed there – in our case, it’s “Top Menu”.
When we click on the main “Save Menu” button, my menu is going to be set.
4. Change Your Blog Sidebar and Footer
Depending on the theme that you’re using, you might have anywhere from zero to a handful of sidebars available + maybe a customizable footer as well.
To tune up what’s displayed in all those areas, we’re going to use WordPress widgets.
In simple terms, widgets are small blocks of content that can be displayed in various places throughout a WordPress blog.
To see what this is all about, just go to Appearance → Widgets.
What you see here are all the different widgets that WordPress gives you. Just to name a few:
- Archives – a list of all your past blog posts
- Image – an image of your choice
- Categories – a list of all your blog categories
- Recent Posts
- Search – a search bar
- Text – a piece of custom text
- and a lot more
What you can do with all those widgets is place them in one of the predefined widget areas – usually within the sidebar or the footer.
For example, we can drag-and-drop the “Recent Posts” widget to our “Footer 1” widget area, like so:
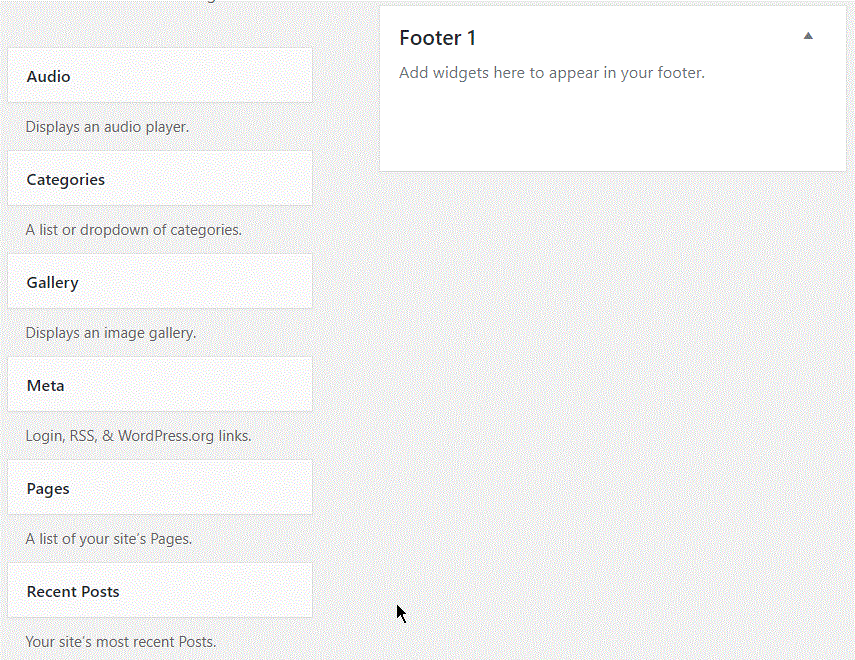
You can do the same with any of the other available widgets. Just grab them from the section on the left and drag-and-drop them onto any of the widget areas that your theme gives you.
Note: The widget areas that you see in your admin panel depend on the theme that you’re currently using.
Launch your blog and keep improving
Congratulations. You can now launch your new blog!
Wasn’t so difficult, was it?
Keep in mind that every blog you create with WordPress is different. You can always change WordPress themes or even buy premium ones to really make your blog look professional and unique.
Here are some further guides that should help to kick-off your blogging journey:
- WordPress Customization (101)
- How to add a contact form to your blog
- How to add email newsletter to your blog
- How to monetize your blog
- How to get traffic to your blog (free and paid ways)
If you get stuck or have any questions about this step-by-step guide, leave a comment below and we’ll help you out 
Comments
Post a Comment