 You’ve purchased a web hosting plan and domain name for your website. And with one click, you’ve installed WordPress on your server.
That’s the easy part. Now, it’s time to start building and customizing your WordPress website.
In this guide to WordPress customization, we’re going to show you how to take the default WordPress installation and customize it. You will learn how to:
- Configure WordPress settings.
- Add new users.
- Choose and customize a theme.
- Set up essential plugins.
- Integrate SEO.
- Create your content.
- Build a contact form.
- Add widgets.
- Set up the menu.
- Connect to Google.
A Step-by-Step Guide to WordPress Customization
By the end of this 10-step tutorial, you’ll have a basic yet fully customized WordPress website set up and ready to go.
Step 1: Configure WordPress Settings
There are a couple of different spots where you’ll find WordPress settings.
The first set will help you customize the look of WordPress itself. The second will help you customize the look of your website.
Customize Screen Options
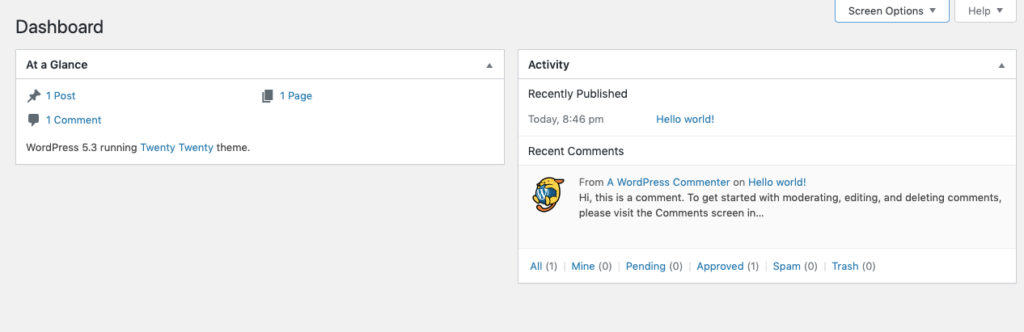
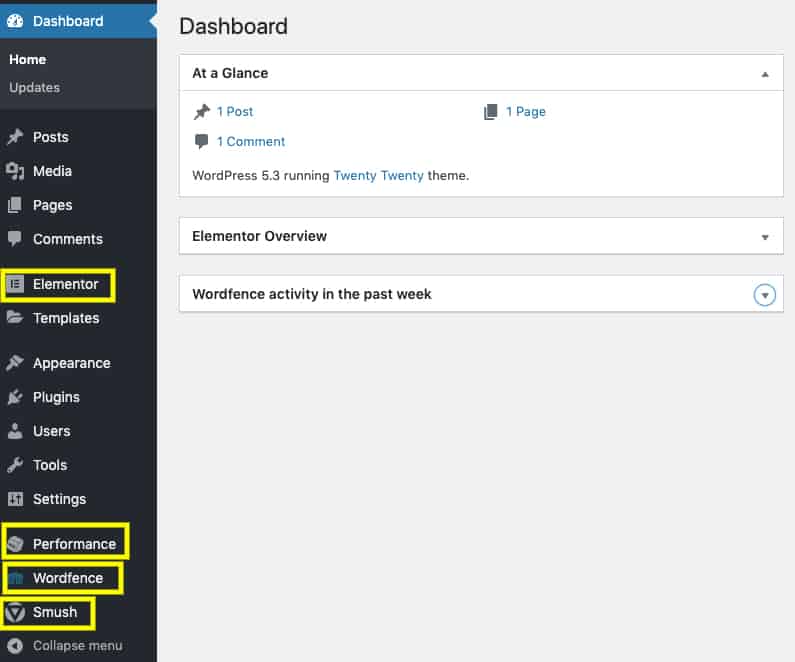
The very first time you step inside of WordPress, this is what you will see:
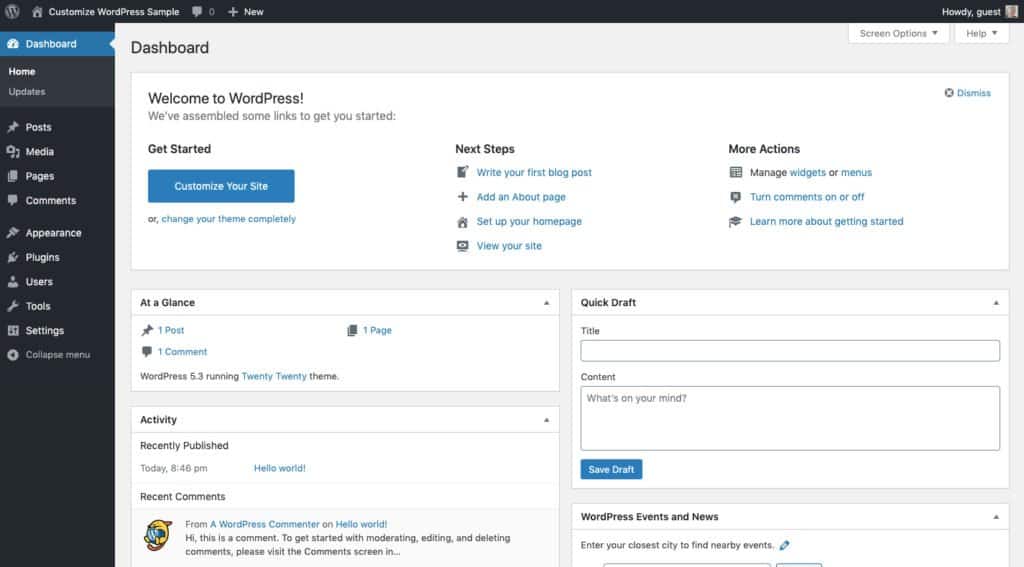
This is the WordPress dashboard. And it’s somewhat distracting with all of those widgets clogging up the screen, right?
So, the first set of settings to customize are Screen Options, which you’ll find here:
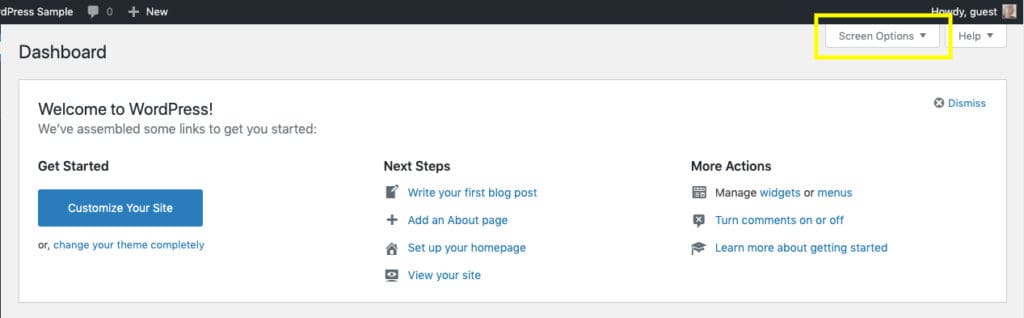
Click on “Screen Options” to open the settings:

The checked Boxes are the ones that appear as widgets on your dashboard.
Activity provides you with a quick snapshot of new content published on your site.
At a Glance shows you how many pages and posts you have published as well as comments you’ve received.
Quick Draft is a way to jot down thoughts or notes for a new blog post, but won’t get you much further than that.
Welcome is nothing more than an oversimplified checklist for first-time users.
WordPress Events and News aren’t really useful unless you’re a developer working in the WordPress space.
If you’d like to keep any of these widgets, simply leave them checked. You can uncheck the rest of the boxes to make them disappear from view.
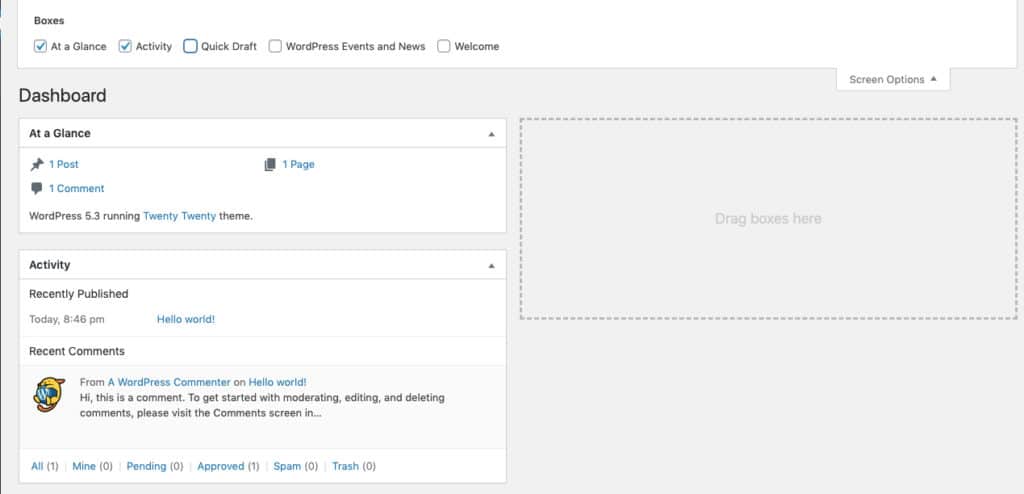
Once you’ve selected which boxes you want to keep, feel free to drag and drop them around. You can stack them vertically (like in the screenshot above) or utilize both columns:
The dashboard view is yours to customize.
Note: As you start adding plugins to your website, you may see new boxes appear on your dashboard. If you find them useful, keep them where they are. If you want to remove them as a distraction, hide them the same way you hid the default boxes.
Customize WordPress Settings
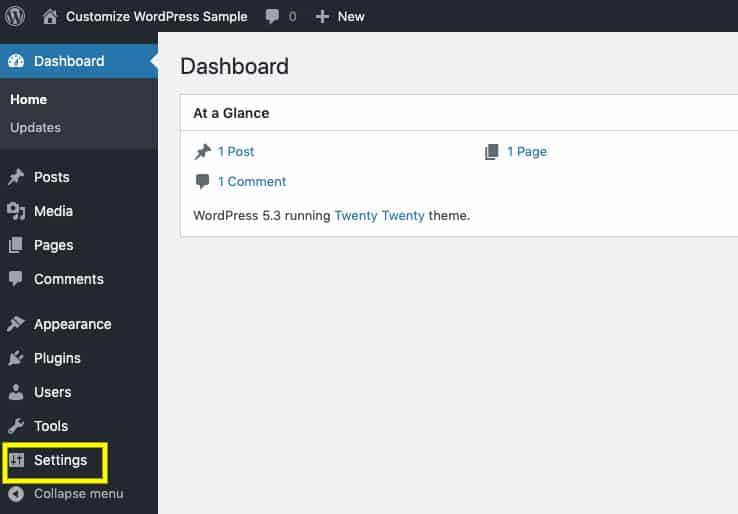
To adjust your WordPress website settings, locate the Settings menu on the sidebar:
Even though you might not need to customize settings in each category, it’s always a good idea to go through each to make sure you’ve dotted your i’s and crossed your t’s.
Start with General Settings:
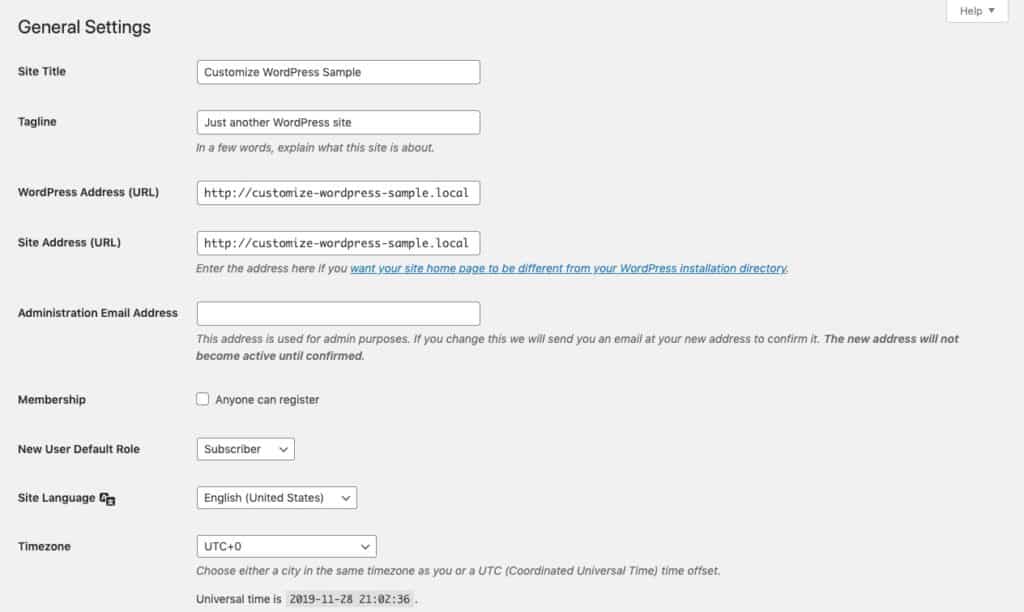
Pay attention to the following:
If you don’t have a logo, make sure you have a Site Title. This will appear at the top of the site in its absence. This is also the name you’ll see in the top-left corner of your WordPress admin.
Make sure the WordPress and Site Addresses match each other as well as the domain name you purchased. If either of these is incorrect, it can cause errors.
Until you’ve begun writing and categorizing your blog posts, you can skip Writing Settings.
Move onto Reading Settings next:

Once you’ve created the content for your site, return to these settings and update “Your homepage displays” (there are instructions on that below). Otherwise, the default setting is to make your blog feed the home page.
For now, focus on the last two settings.
“For each post in a feed, include” should be set to “Summary”. This is useful not only for visitors who want to quickly scroll through the blog topics in your feed but also for speeding up the loading time of the page.
Before you save your changes and move on, make sure that “Search Engine Visibility” remains unchecked. You definitely want Google and other search engines to find your website and index it.
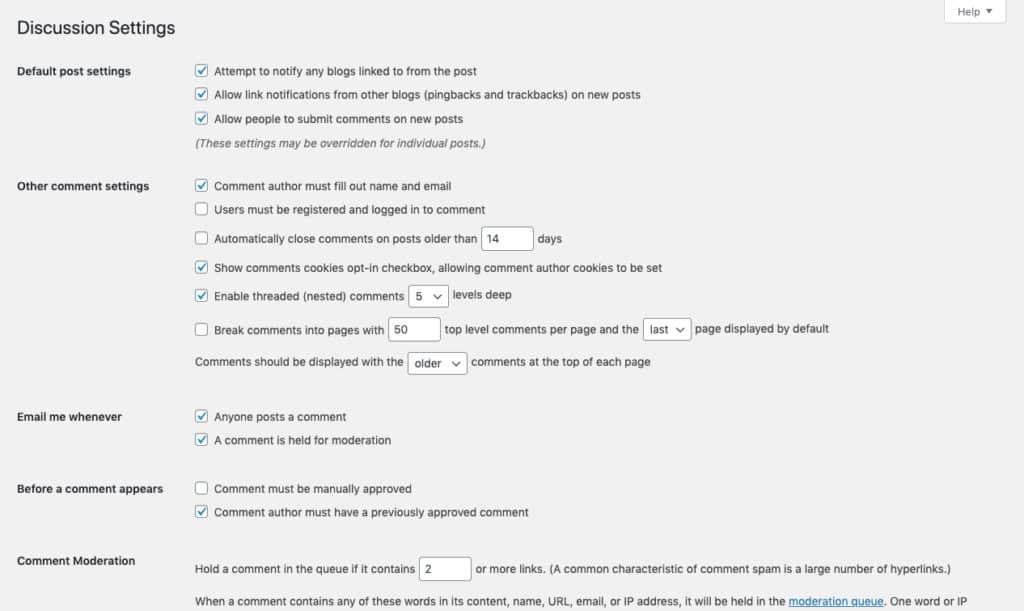
If you plan on blogging, your next stop is Discussion Settings:
You can customize most of this page however you see fit. If you want blog readers to be able to comment on your content, configure the settings accordingly.
That said, there is one setting you should fix here for security purposes.
Under “Default post settings”, uncheck “Allow link notifications from other blogs (pingbacks and trackbacks) on new posts”.
In a nutshell, pingbacks and trackbacks are notifications that show up in your comment moderation feed whenever someone links to your blog.
There’s no real value to see pingbacks or trackbacks. Plus, they’re a known security risk, so it’s best to turn them off and keep hackers and spammers from accessing your site that way.
If you ever decide you want to adjust WordPress’s default image size, you can do that in Media Settings. It’s probably not worth doing right now though.
Next, move onto Permalink Settings.
The permalink is the structure of your web page addresses. WordPress gives you a number of options to choose from:
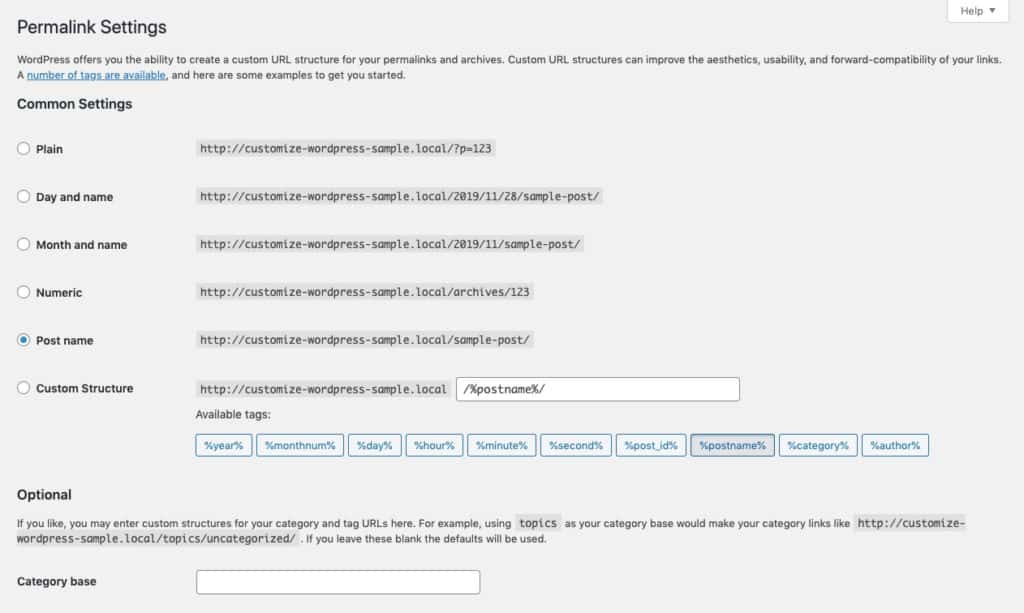
By default, “Post Name” is the way your links will be structured — and it’s a good choice. It keeps your URLs simply structured and easy to return visitors to recall.
But it’s up to you. If it makes sense to structure your blog posts by the date of publication, you may want to enable one of those options. However, that’s more than likely to overcomplicate things.
Privacy Settings was only recently added to WordPress Settings:
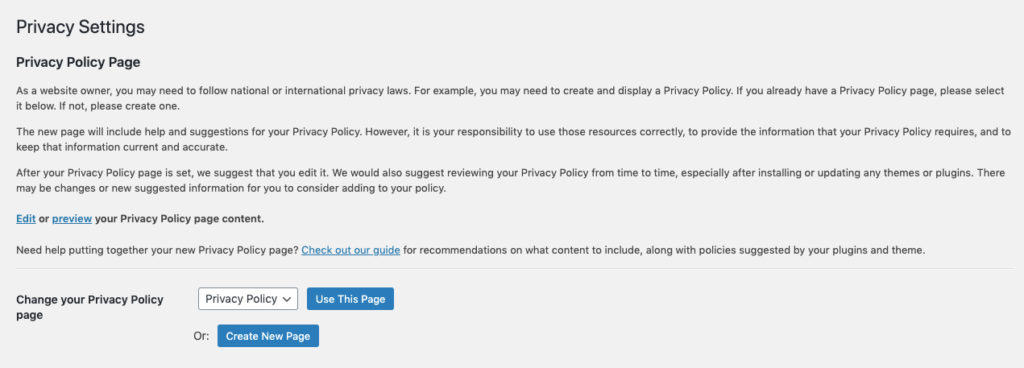
In light of GDPR and the far-reaching effect it had on WordPress websites around the world, privacy has become an important component of the website development process.
There are other things you can and should do to enforce strict privacy standards on your site. As a start, select a Privacy Policy page (which WordPress will auto-create for you) that visitors can refer to if they have questions or concerns.
Step 2: Add New Users
With WordPress settings out of the way, you should now turn your attention to the Users menu.
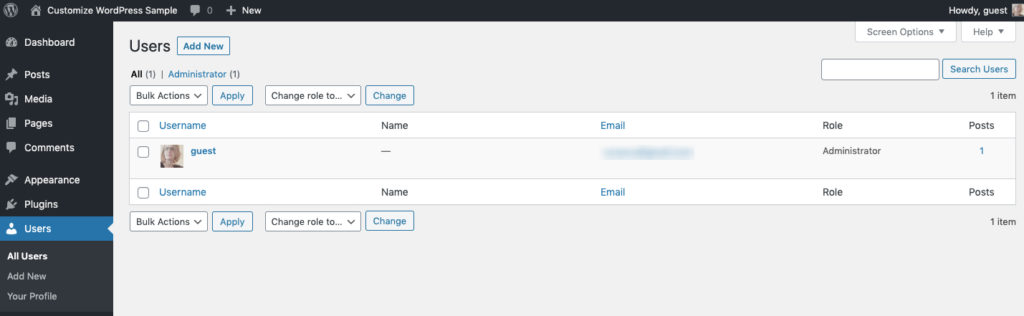
This is where you’ll create new users as well as edit current users’ profiles, access privileges and login information — including your own.
Add a User
To add a new user, click “Add New User” and fill in the following details:
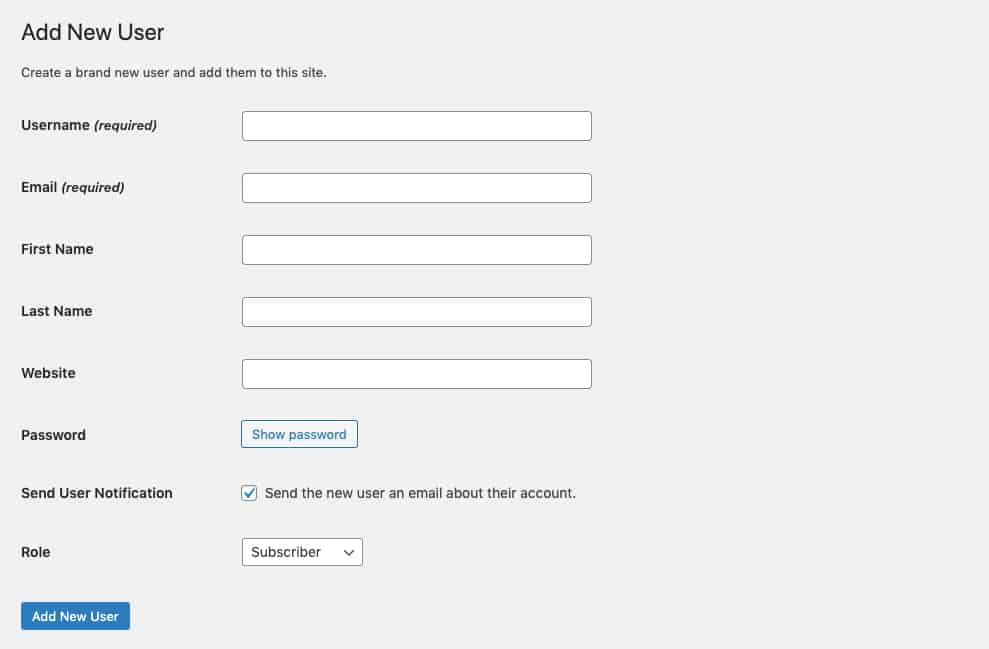
The only fields that are required are their Username (make sure it’s never “admin”) and Email Address.
Make sure to customize their user role before you add them to the system:
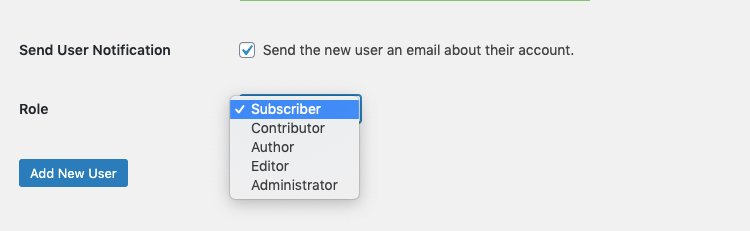
This will dictate how much of the WordPress admin backend they can see and what sort of editing controls (if any) they have.
Edit a User Profile
Even if you’re the only person working on this website, it’s still a good idea to visit your user profile and make sure it’s up to date.
This is what you’ll see when editing your own profile:
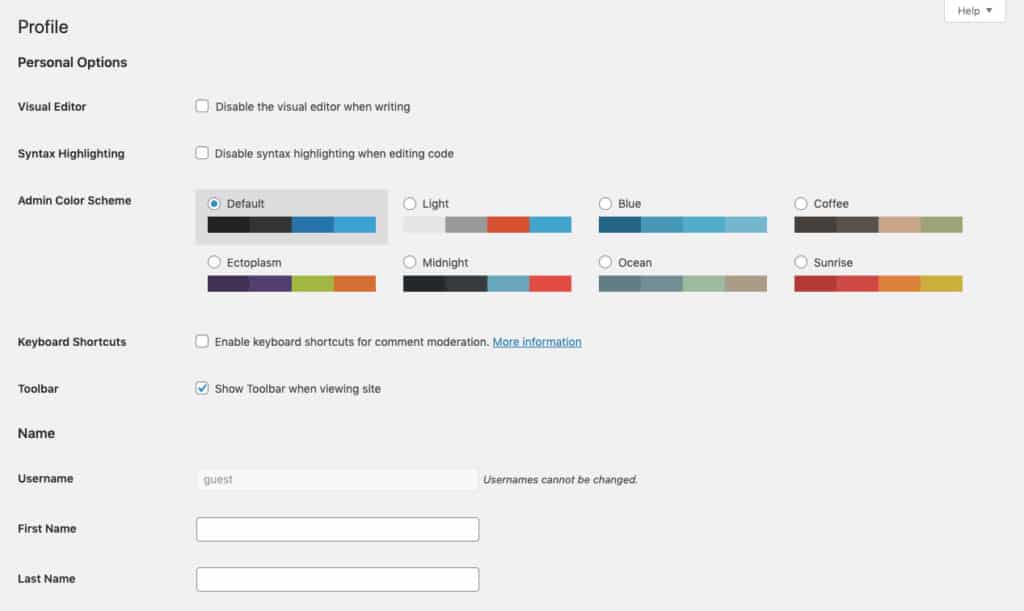
The only thing you might want to customize in this section is the color scheme of the WordPress admin area. Otherwise, scroll down and start to fill in your profile details.
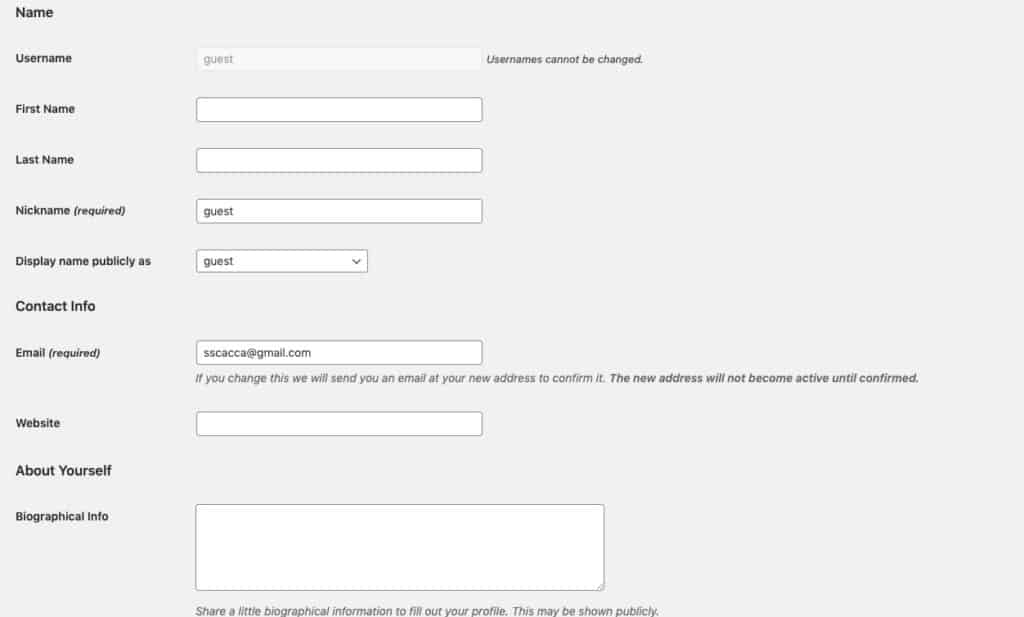
This might not seem like a big deal right now, but if you decide to blog, this is where your biographical info will be pulled from (and the same for other users).
One final thing to make note of is the Account Management section:
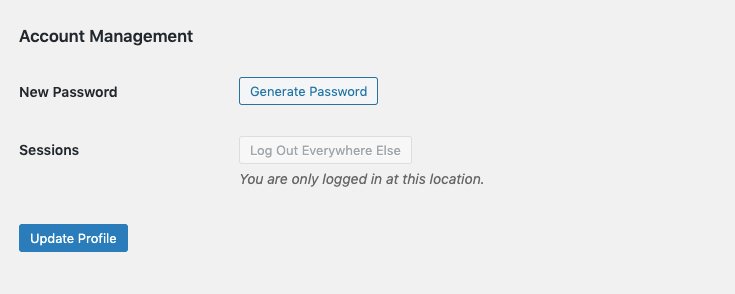
If you ever want to change your password (which is a good thing to do at least a couple of times a year), do so here.
What’s nice about this is that WordPress helps you generate stronger passwords (and will encourage your other users to do so as well):
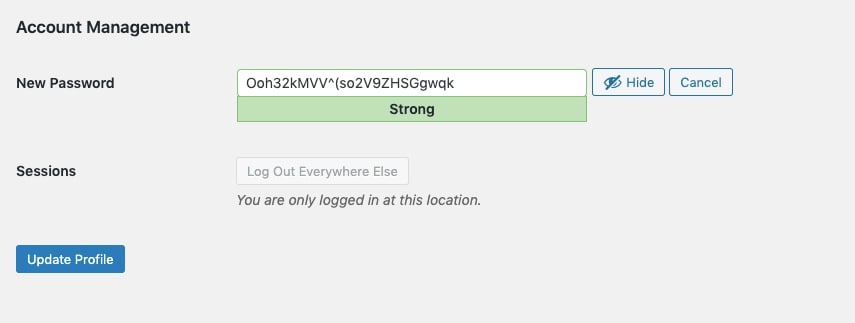
Make sure you’ve created a strong password here — with or without the tool — that includes lowercase and uppercase letters, numbers, and symbols.
Step 3: Customize Your Theme
Before you can customize a theme, you first need to find the right one for your website.
There are tens of thousands to choose from, so let this guide of the 25+ best and most popular WordPress themes help you narrow your focus.
Once you’ve selected a theme, go to the Appearance > Themes menu.
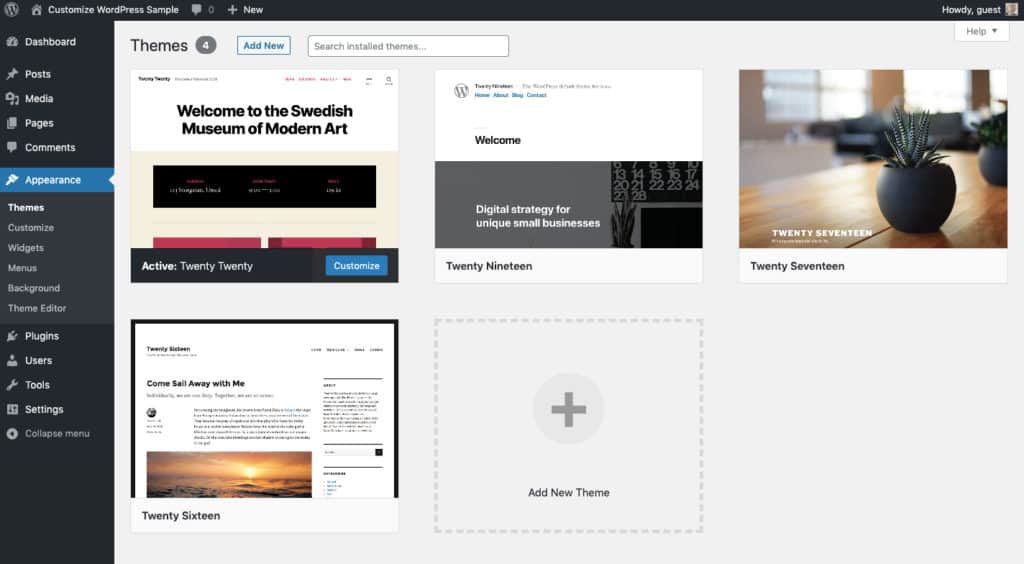
By default, WordPress will have auto-installed its own themes on your system. To install a different theme, you need to install it first.
Install a Free Theme
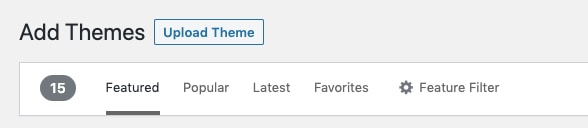
If you have a free theme from the WordPress repository like OceanWP, click the “Add New” button and look for your theme’s name:
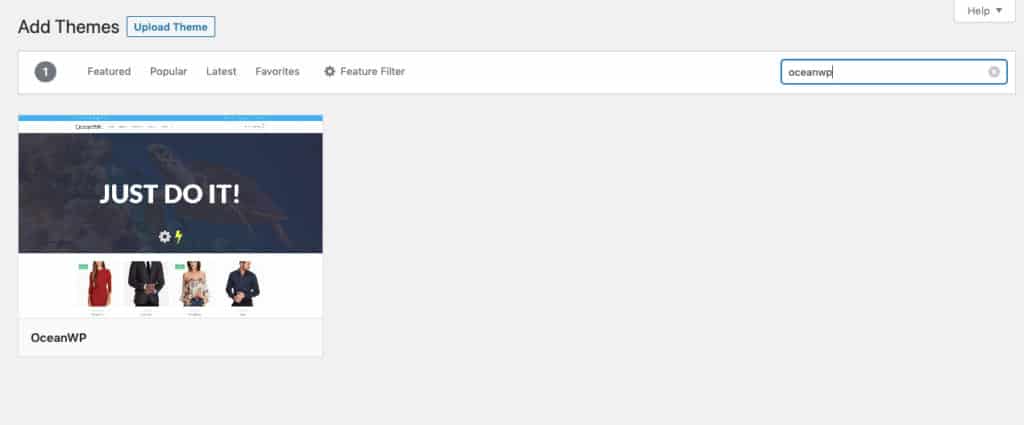
Hover over the theme card and click “Install”. The blue “Install” button will change to a blue “Activate” button. Click this when you see it.
This will replace the default WordPress theme with your own.
Install a Premium Theme
If you have a premium theme, you’ll first need to download the theme’s files. If you’ve gotten them from a third-party provider or a theme marketplace like ThemeForest, you’ll find them in your account:
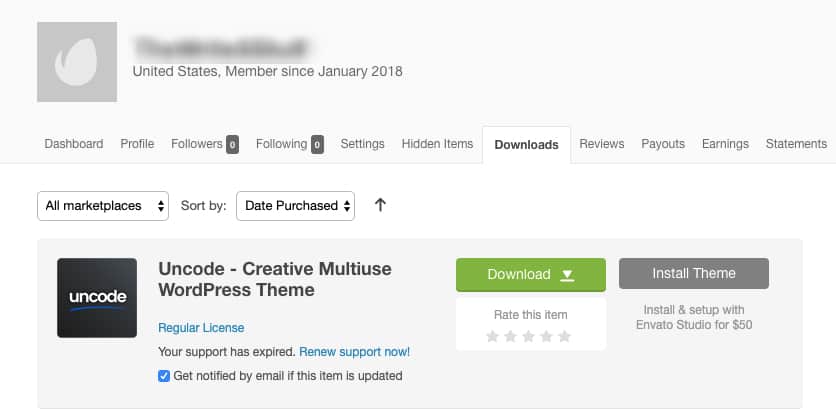
Download the files and then return to WordPress.
Click “Add New” to add your theme. Then click the “Upload Theme” at the top of the screen:
A file uploader will appear and you can drop your WordPress files into it:
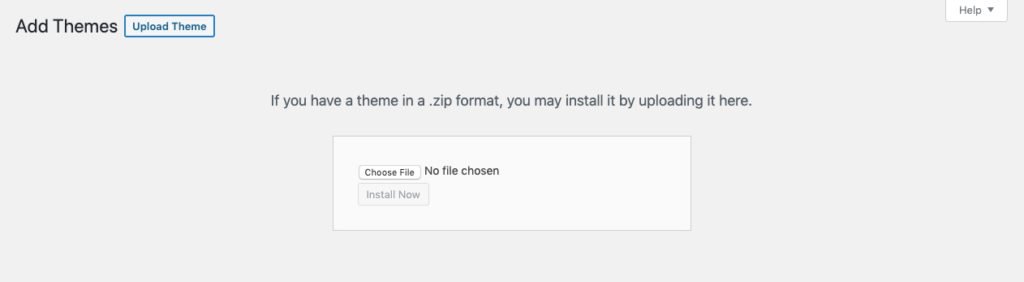
The uploader will automatically install and activate the theme for you.
Customize Your Theme
With your theme now installed, it’s time to customize it. Under the Appearance menu, click Customize. This will initiate the WordPress Customizer:
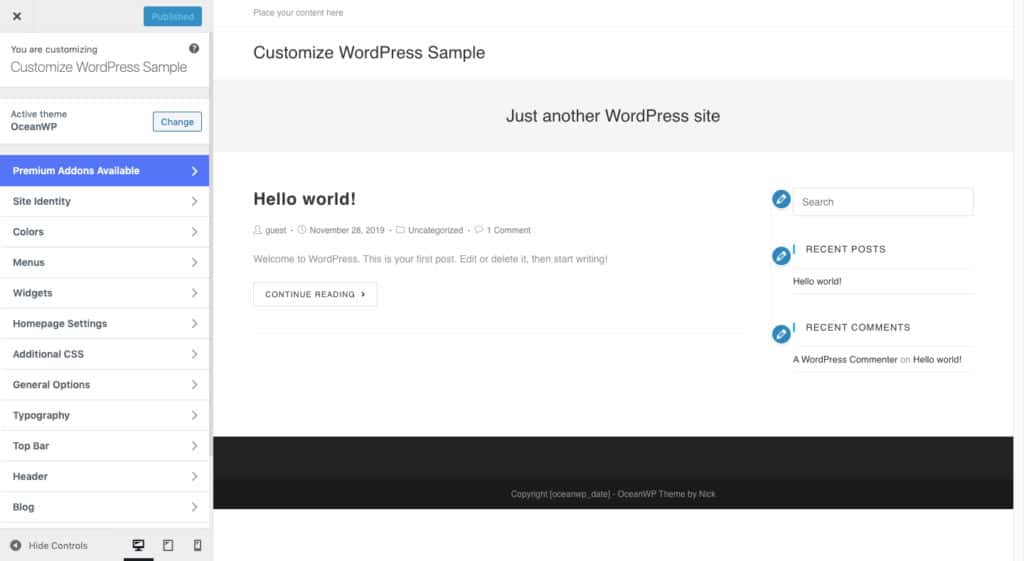
While this tool will look different from theme to theme, the layout will always be the same. Your WordPress customization options will be on the left and the preview on the right.
Let’s walk through the basic customization modules you’ll be able to use here:
Site Identity
If you already updated your Site Title (or Tagline) under General Settings, there’s no need to do so again. Remember: these will only appear on the website if you don’t add a logo.
If you already updated your Site Title (or Tagline) under General Settings, there’s no need to do so again. Remember: these will only appear on the website if you don’t add a logo.
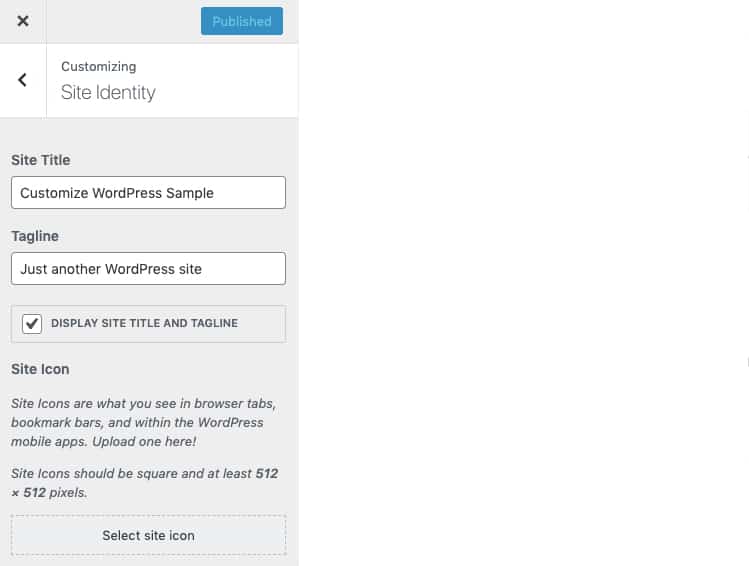
By unchecking the box here, you’ll make room for the logo (which we’ll add shortly).
Now, the Site Icon isn’t your logo. It’s the recognizable symbol — usually a smaller piece of a logo — that appears in the browser tab.
For example, you can see here the site icons for WebsiteSetup.org, WordPress.org, and Google:
Notice how each of the icons makes it easy to find the exact page you want to return to? Once your logo is designed, make sure you have a distinctive Site Icon to match it. Then, upload it here.
Logo
You’ll find this under the “Header” section:
You’ll find this under the “Header” section:
To add your logo, click on the “Select logo” and upload it from your device.
Make sure the logo has a transparent background (which means it needs to be a PNG or WebP). That way, it won’t matter what background color it appears on top of.
If the logo is too tall for space, use the slider to adjust the width accordingly. You don’t want it to be so big that there’s excessive white space around your navigation menu on the right.
Colors
Many of the decisions regarding colors will be determined by the theme and templates you use. However, you can change some of the universal colors here.
Many of the decisions regarding colors will be determined by the theme and templates you use. However, you can change some of the universal colors here.
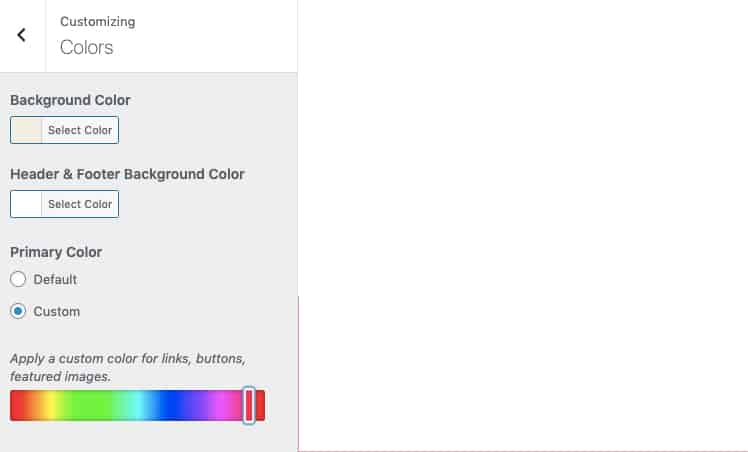
The Header color, for instance, can be updated if you’d like to use something other than the default white. It might also be worthwhile to adjust the Primary Color used for links and buttons to a branded color.
Global
You may find other global settings you want to customize:
You may find other global settings you want to customize:
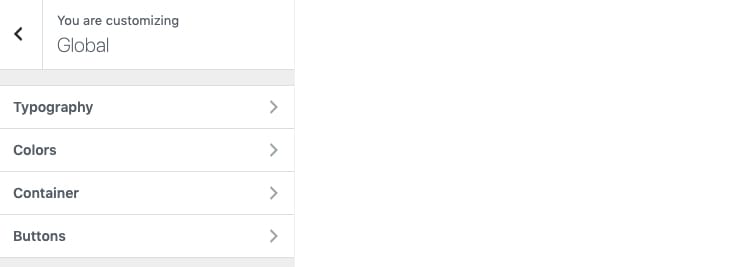
If you’ve already sorted out your branding — logo, color palette, fonts, etc. — you can customize those settings here. If not, you may want to leave them be and let the theme’s default settings stay as they are.
If your theme gives you access to these settings, just know that it’s not the basic color or font choices you’ll be making. You can alter the sizes of fonts, the default layouts of pages, the colors of your theme elements, and so on.
If you’re unsure whether or not you need to change anything, at least give these settings a look to make sure you’ve covered your bases.
As for other settings you may encounter in the Customizer, you’re going to address most of them in the later steps. So, don’t worry if we haven’t touched on everything. We’ll give you tips on how to customize them later.
Customize Your Premium Theme
For all themes — free or paid — you’ll use the WordPress Customizer to start. However, if you have a freemium or premium theme, you’ll have additional settings to configure.
Look on your WordPress sidebar and see if there is a new menu item for your theme. If there is, you’ll find your settings there.
For instance, this is the main panel for the Uncode theme:
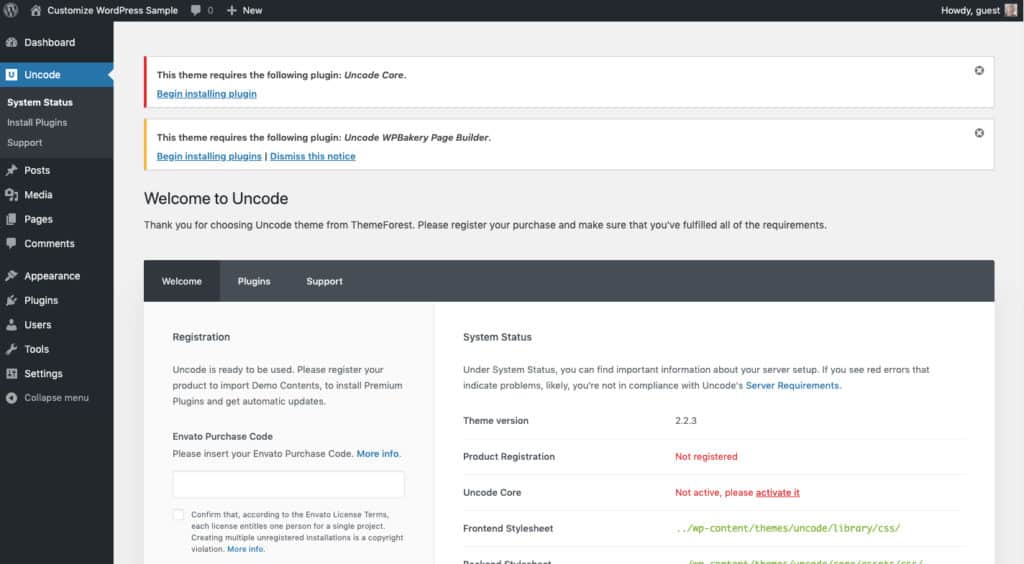
There actually aren’t any settings to customize. However, the theme does prompt users to install a number of plugins that are necessary for the theme to work as intended.
With the Astra free theme, a new menu tab appears under Appearance:
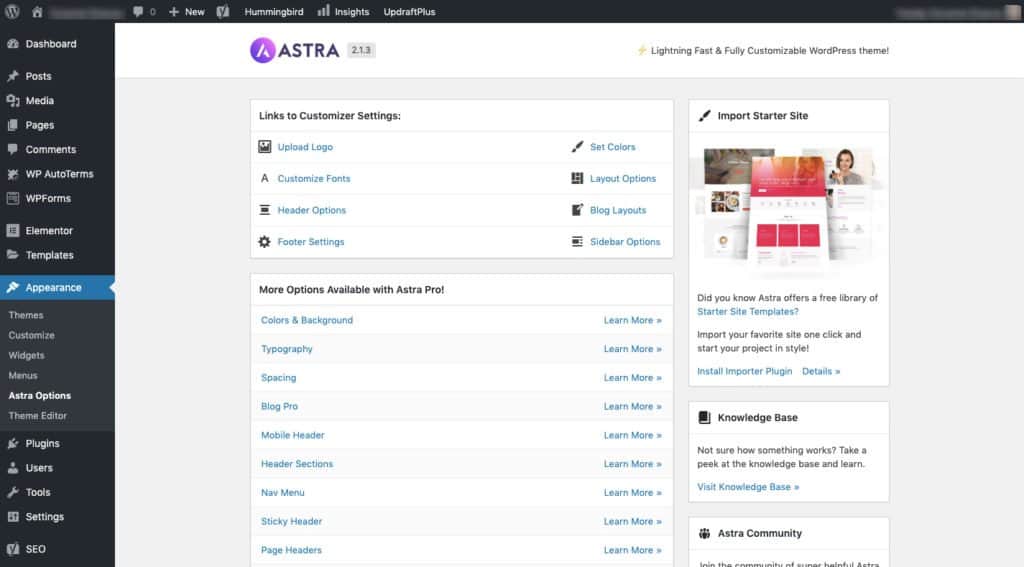
The free settings will simply take you back to the WordPress Customizer. However, if you upgrade to pro, you’ll open up even more customization options, as you can see from this list.
Bottom line: WordPress will give you certain theme customizer settings by default. Depending on which theme you choose, you may have more to work with.
However, don’t sweat it. Once you start building your pages, you’ll get a sense of whether or not additional theme tweaking is needed and you can always return to this menu.
Step 4: Set Up Essential Plugins
While you can add as many WordPress plugins as you need to your website, you’ll want to exercise restraint in this.
Find Your Essentials
Plugins are great for extending the functionality of a website without having to use any code but can put undue pressure on your hosting server.
So, to start, focus on setting up only the essentials. You can add other WordPress plugins later on as needed.
Security
To protect your WordPress login screen from brute force attacks and the website itself from becoming a home for spam and malware, you’ll need the help of a security plugin like Wordfence.
To protect your WordPress login screen from brute force attacks and the website itself from becoming a home for spam and malware, you’ll need the help of a security plugin like Wordfence.
Caching
WordPress websites have a tendency to become slow and sluggish if you don’t add caching to them. All caching is is a process by which your web server more efficiently delivers your website to visitors’ browsers. What’s nice about most WordPress caching plugins like W3 Total Cache, though, is that they come with other performance optimization settings, like Gzip compression and file minification.
WordPress websites have a tendency to become slow and sluggish if you don’t add caching to them. All caching is is a process by which your web server more efficiently delivers your website to visitors’ browsers. What’s nice about most WordPress caching plugins like W3 Total Cache, though, is that they come with other performance optimization settings, like Gzip compression and file minification.
All of these things are meant to make your website load faster.
Image Optimization
Another thing every website needs is an image compression plugin like Smush. This way, you can use a bunch of high-resolution images to design your website or show off your products without worrying about the large file sizes slowing everything down (which may happen without this plugin).
Another thing every website needs is an image compression plugin like Smush. This way, you can use a bunch of high-resolution images to design your website or show off your products without worrying about the large file sizes slowing everything down (which may happen without this plugin).
Backups
Your web hosting plan should include free websites. However, it’s always a good idea to have an extra set of backups stored somewhere else just in case something happens to the originals. Plus, with a backup plugin like UpdraftPlus, you can automate and schedule backups to happen in the background.
Your web hosting plan should include free websites. However, it’s always a good idea to have an extra set of backups stored somewhere else just in case something happens to the originals. Plus, with a backup plugin like UpdraftPlus, you can automate and schedule backups to happen in the background.
Page Builder
Although this one is optional, you’ll probably find that you can work more quickly with a drag-and-drop page builder plugin than with the block editor WordPress gives you. There are a ton of them out there, so make sure you choose a page builder plugin that works best for your purposes.
Although this one is optional, you’ll probably find that you can work more quickly with a drag-and-drop page builder plugin than with the block editor WordPress gives you. There are a ton of them out there, so make sure you choose a page builder plugin that works best for your purposes.
Install Your Free WordPress Plugins
Once you have a list of the essential plugins you need, install and activate them.
To do this, go to Plugins > Add New:
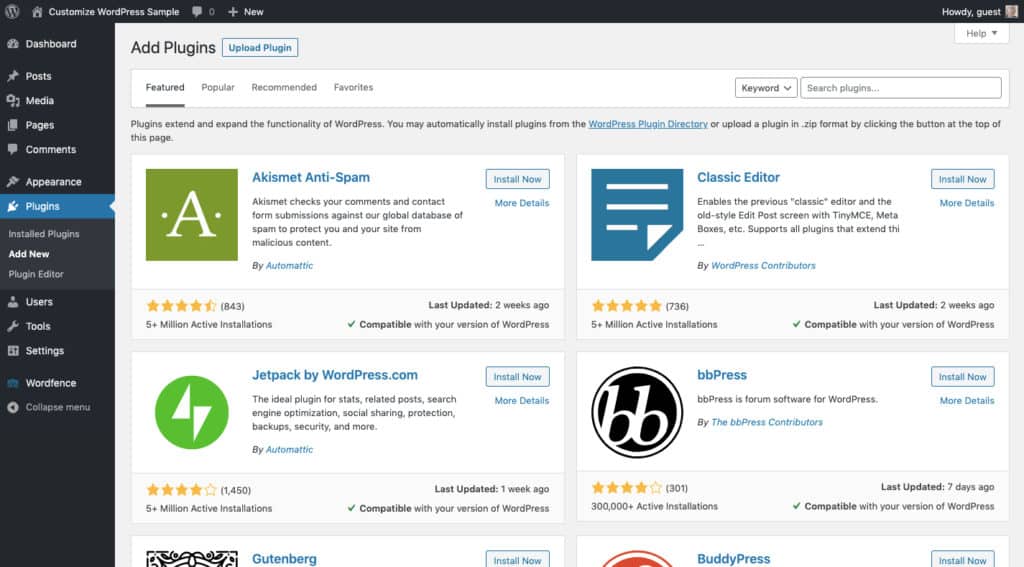
This is the free WordPress plugin repository. To find the plugin you’re looking for, simply type the name of it in the search box.
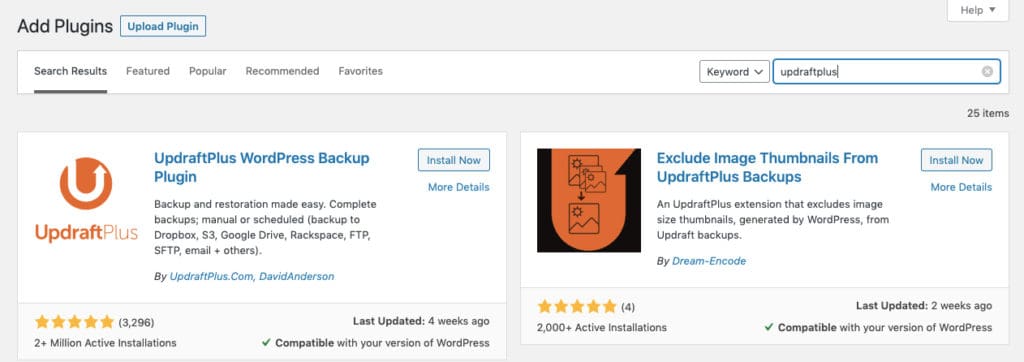
Click the “Install Now” button for the plugin you want to add. The button will change to a blue “Activate” button. Click it to add the plugin and its functionality to your website.
Repeat these steps until you’ve installed all of your essential plugins.
Install Your Premium Plugins
If you’ve purchased a premium plugin from a third-party provider or marketplace, it’s the same process as installing a premium theme.
Go to Plugins > Add New. Click “Upload Plugin”.
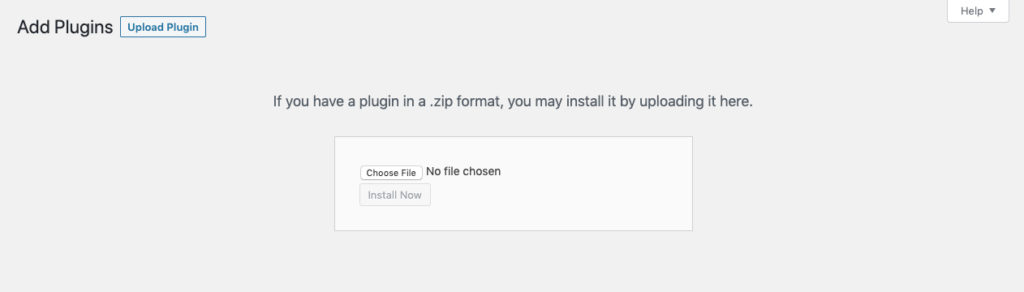
Then, upload the downloaded files. The installer will automatically install and activate the plugin for you.
Customize Your WordPress Plugins
After installing a WordPress plugin, you’ll usually receive a prompt that asks if you’re ready to get started, like this introduction from Elementor:
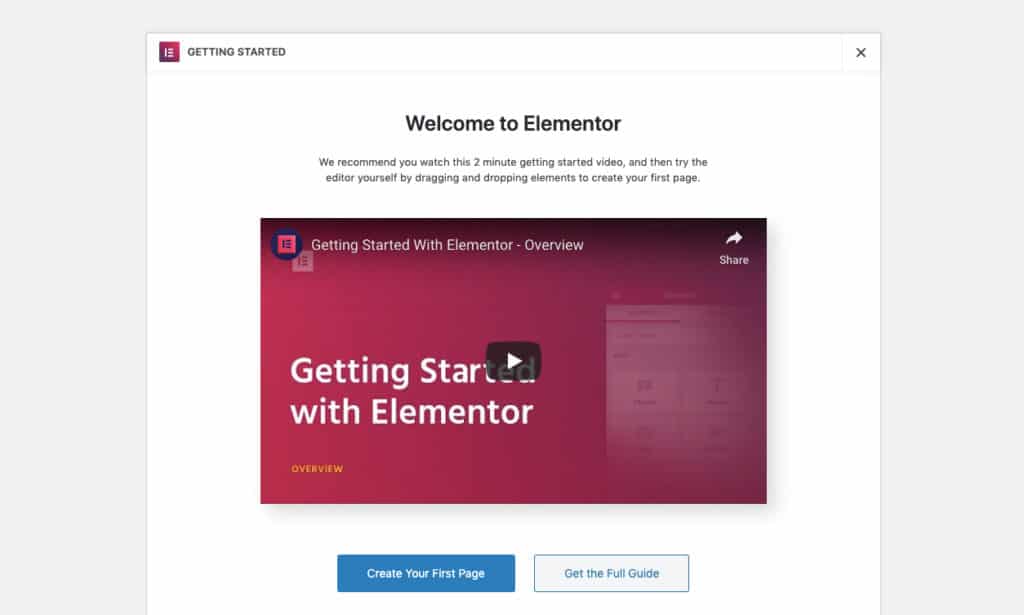
Although most WordPress plugins come preconfigured, you should still take time to review each of your newly installed plugins and make sure there aren’t any other settings you want to customize.
To locate your new plugin’s settings, simply look at your sidebar. You should see a new menu item for each of them.
The menu names might not always match the plugins (like “Performance” is the menu for the W3 Total Cache plugin). And some of the menus might not be on the top-level like the examples above.
For instance, UpdraftPlus’s menu is hiding beneath Settings:
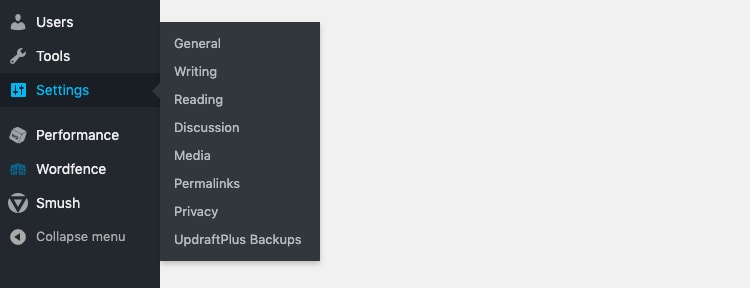
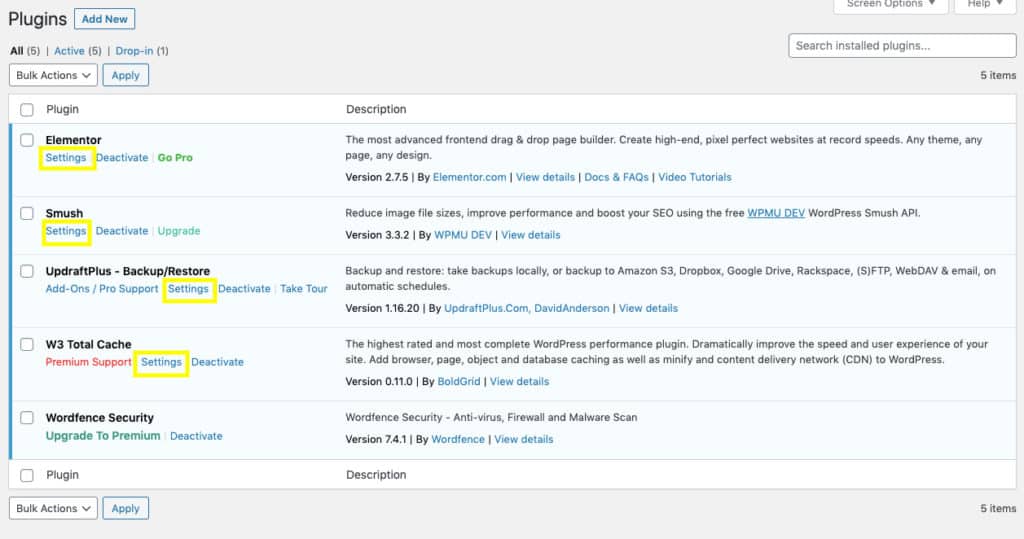
If you ever have a hard time finding your plugin settings menu, go to your main Plugins page and click on the Settings buttons there:
Settings will differ from plugin to plugin, so there isn’t much to run through. Again, just take your time running through the setup procedures you’re given like this one from Smush:
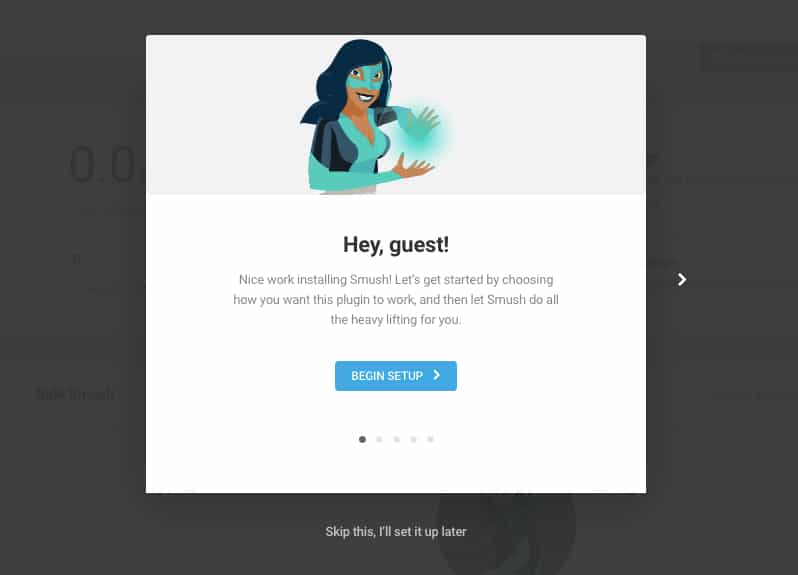
And also pay attention to any recommendations the plugin developer has put on your settings page. These tips are useful for ensuring you’ve properly customized and optimized your plugin.
Step 5: Integrate SEO
Search engine optimization (SEO) is a complex matter. As such, I’m not going to dig into the intricacies of how to optimize a website in full today.
However, what I do want to show you is a fast and easy way to add an SEO tool to WordPress that will help you get started with it.
Install the SEO Plugin
The plugin you need is called Yoast SEO.
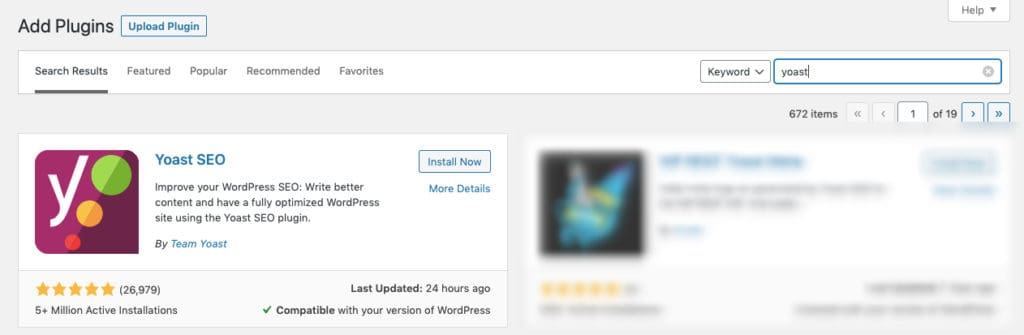
This is the top-rated and downloaded SEO plugin in WordPress. And if you want to have your search engine optimization made easier for you, this is the best plugin to do it with.
Set-Up and Customize Yoast SEO
Once the plugin is installed, locate the new SEO menu on the sidebar:
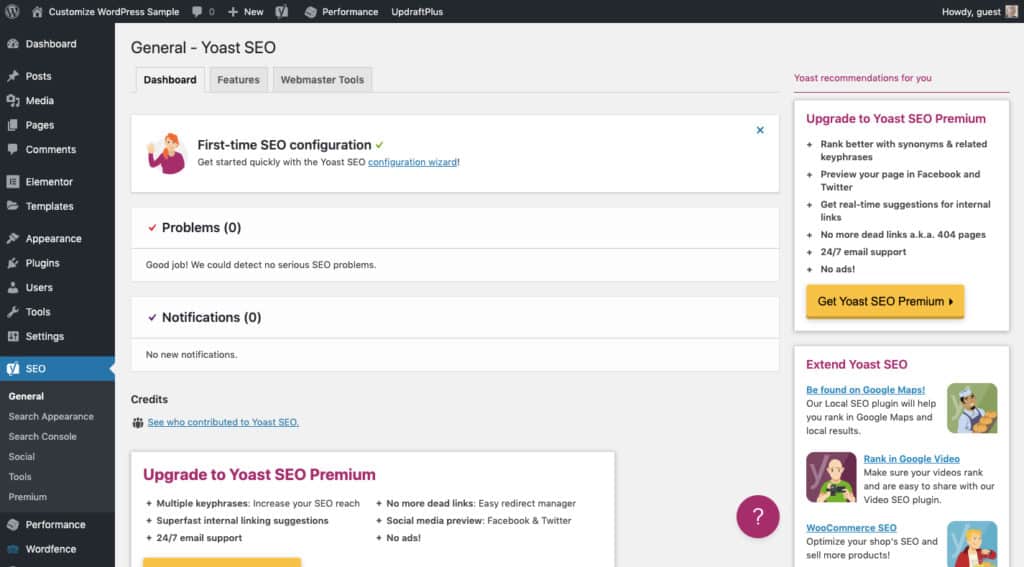
This will open up your Yoast dashboard. You’re going to need about five to ten minutes to run through settings customization, but the configuration wizard will speed things up.
Click on the link provided to start the process.
Environment
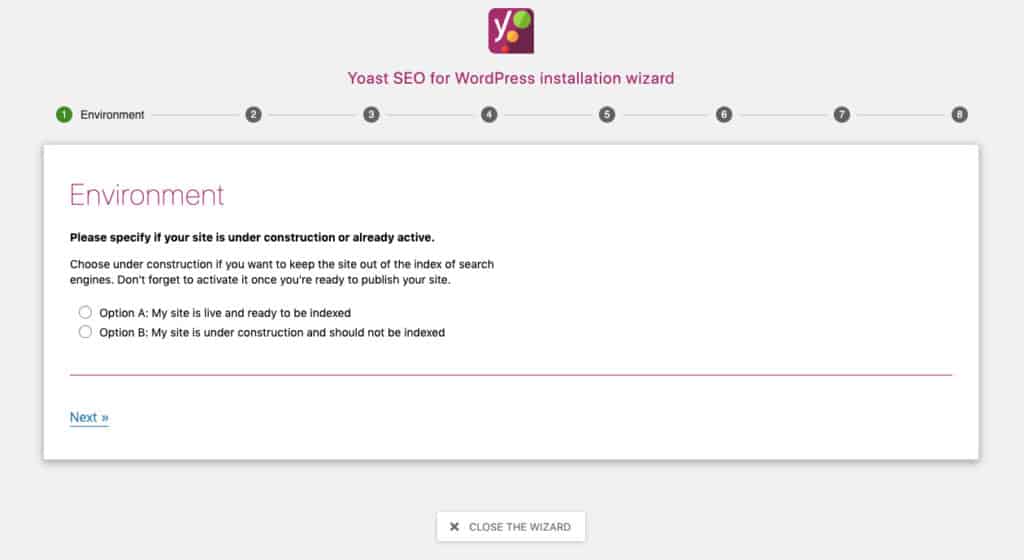
Choose Option A.
It takes Google about a week or so to index a website, so you don’t have to worry about your website showing up in search before it’s completed. There’s not much more to this process to complete anyway.
Site Type
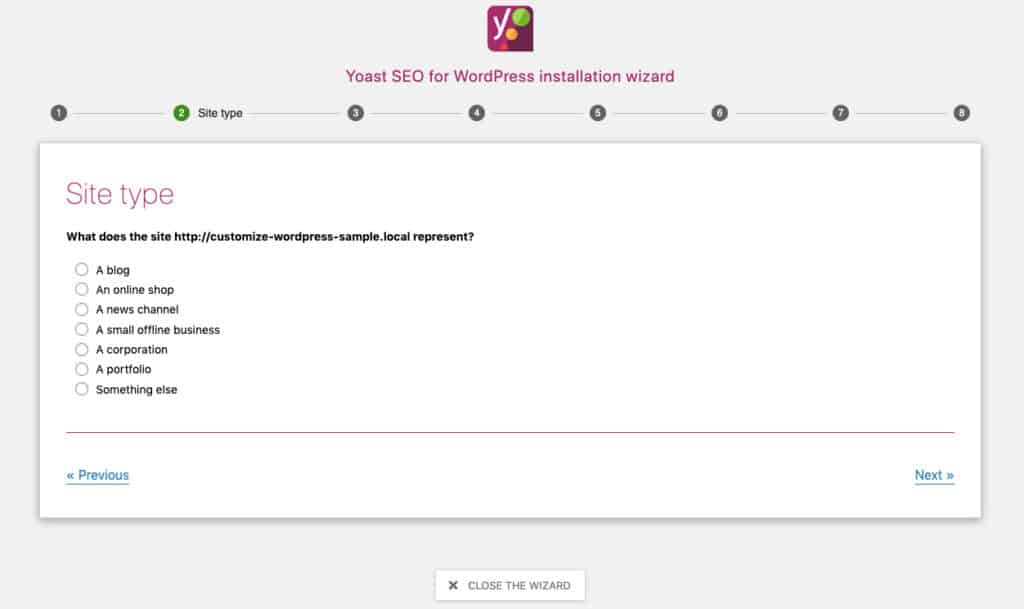
Choose what kind of website you’ll be building. Yoast will let search engines know so they can show your pages and posts to people looking for that kind of content.
Organization or Person

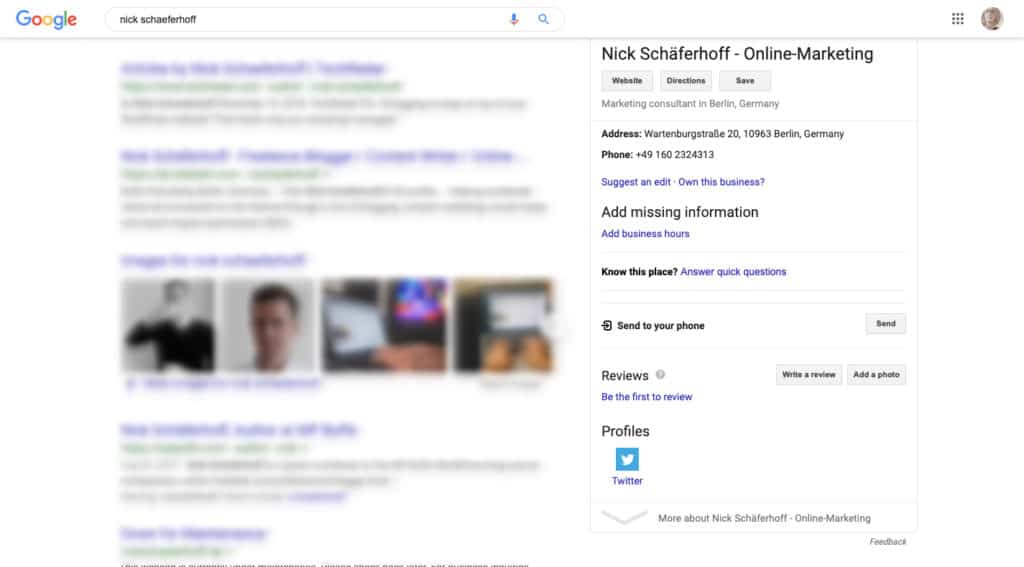
Make sure to fill in this page. Once you start to generate (brand) name awareness, you want people to be able to preview your details when they look for you in search.
Here’s an example of how your details may appear in the knowledge graph when that happens:
Search Engine Visibility
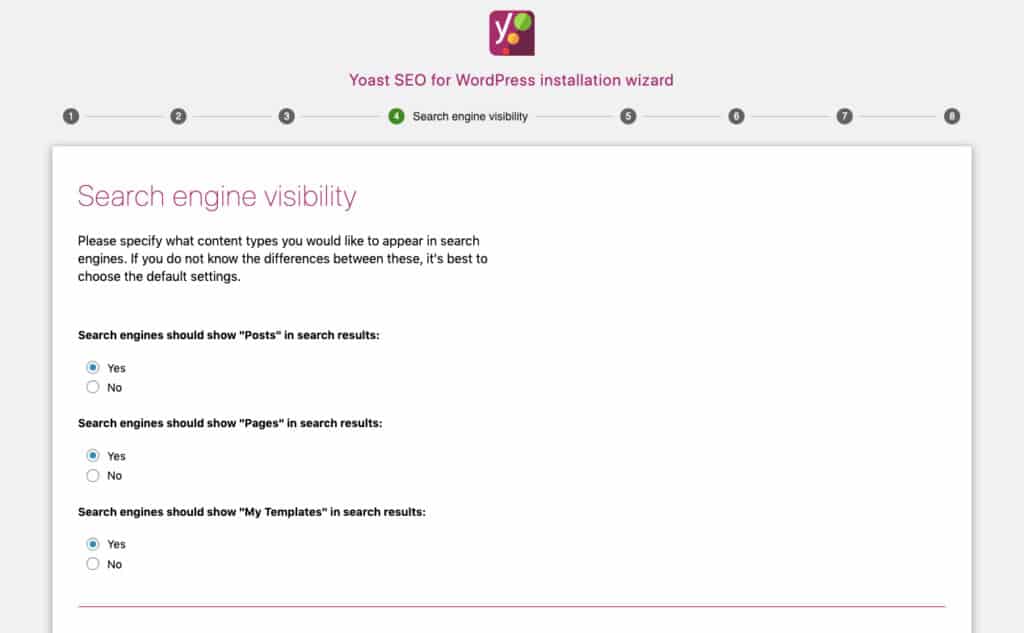
Unless you have private content you don’t want people on the web to find, leave all of these values set to “Yes”.
Multiple Authors
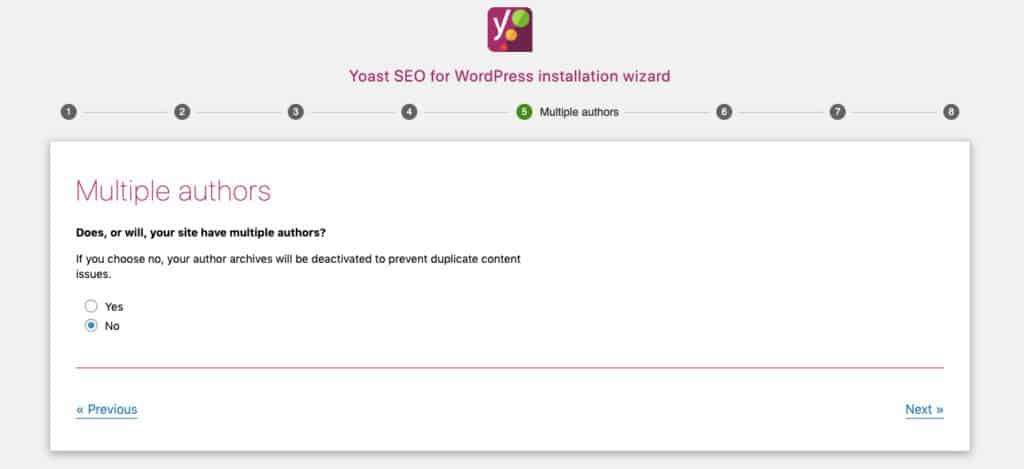
For blogs with multiple contributing authors, it’s a good idea to activate this setting so that people searching for those individuals will find their archive pages in search and, subsequently, your website. If it’s just you writing blogs, keep this value as “No”.
Title Settings
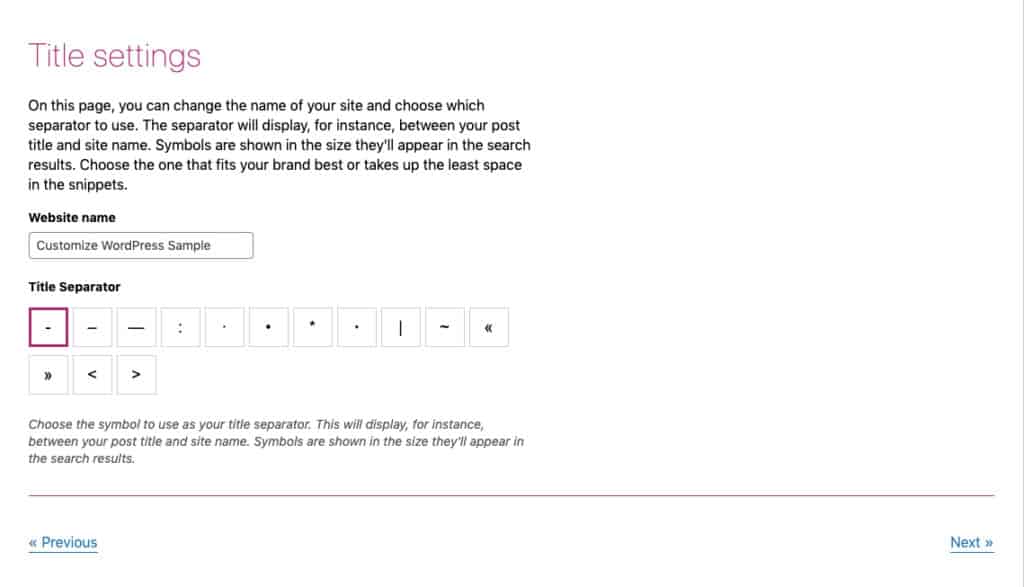
Generally, when a web page appears in search, it displays the title of the page (or post) and the website or business name after it. For example:
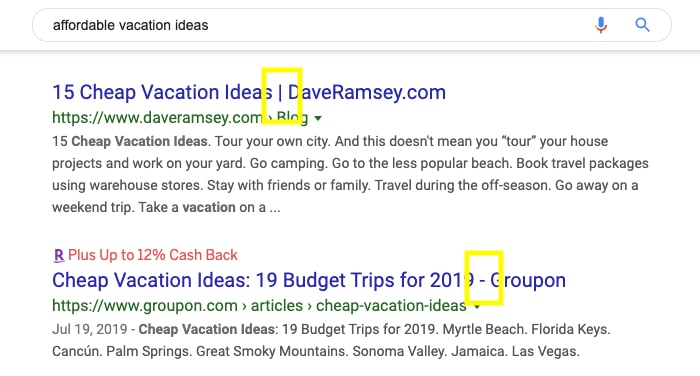
But rather than have your titles run into the brand name, you can have Yoast automatically place a divider between those essential pieces of data. The dash (-) and the pipe (|) are the most commonly used, but you can choose any of the options provided.
Other Yoast Settings
The configuration wizard is going to take care of most of the setup you need for this plugin.
That said, you may want to poke around the Search Appearance and Social sub-menus. Here you can further customize how your pages and links show up outside of your website.
This will also help you save time in customizing these details every time you create a new page in WordPress.
Use the SEO Plugin
Why did we have you set up the SEO plugin before you have any content to optimize? To save you time.
As you go through the next step, you should use Yoast every time you create new content.
Below each web page or blog post you create, you will find the Yoast SEO widget:
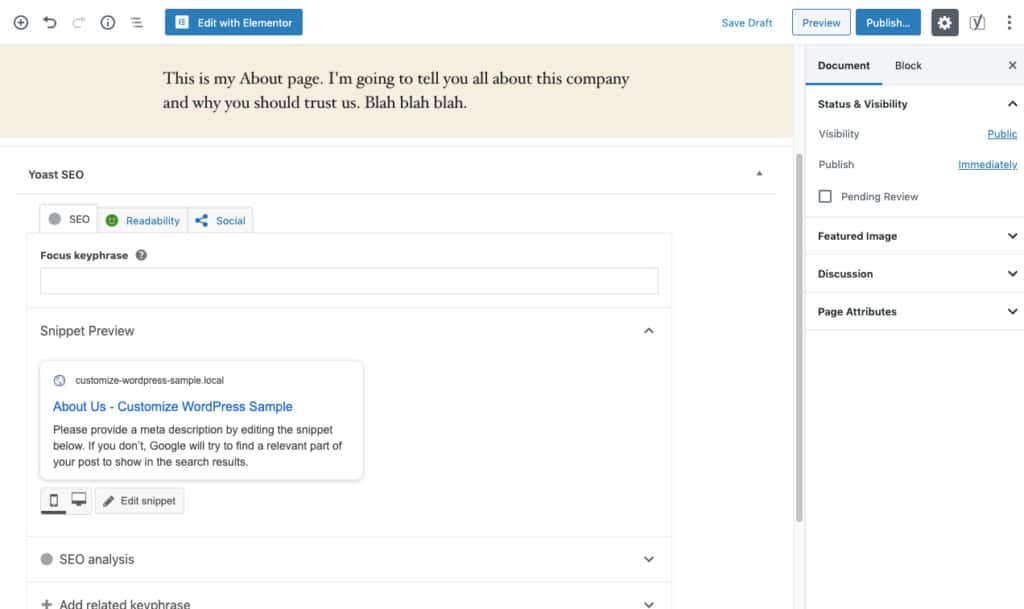
It’s here you’ll add your search data (all the stuff people will see when they find you on the web).
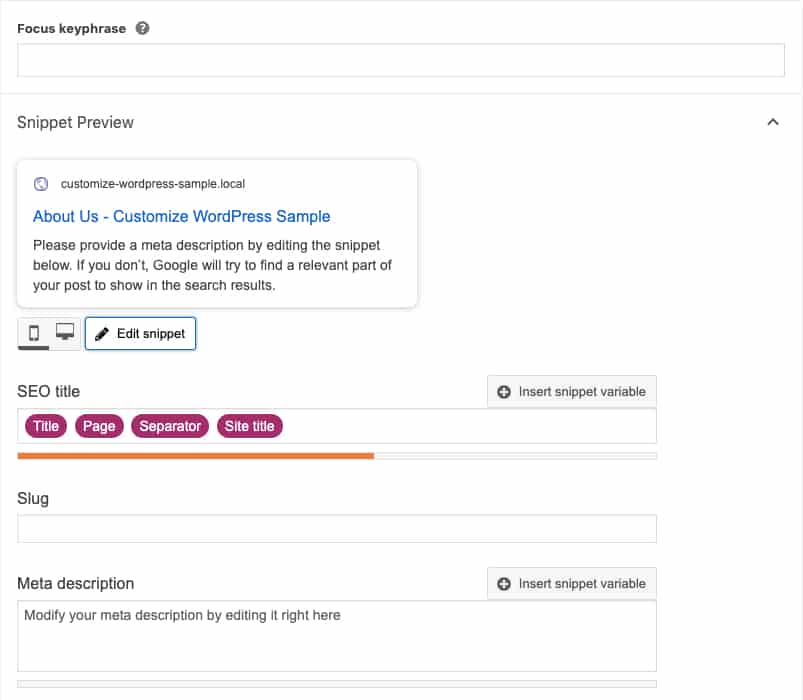
Make sure to always create a custom:
- Focus keyword — the main topic and keyword for the post
- Slug — the specific link to the page
- Meta description — the brief description that appears beneath the page title in search results
When you’re done, Yoast will “score” how well you’ve optimized the page for SEO.
You’ll find tips on how to improve the rankability of your website under the SEO tab:
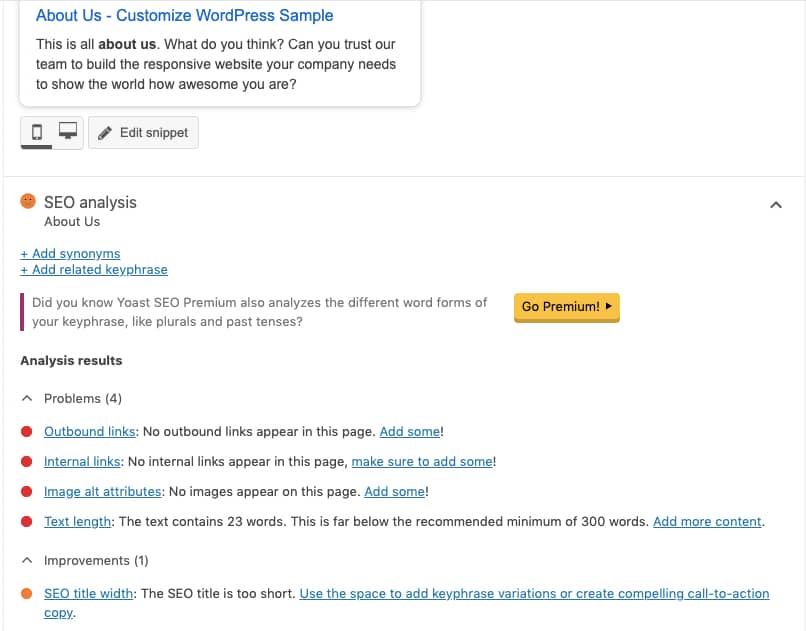
You’ll find tips on how to make your page easier to read under the Readability tab:
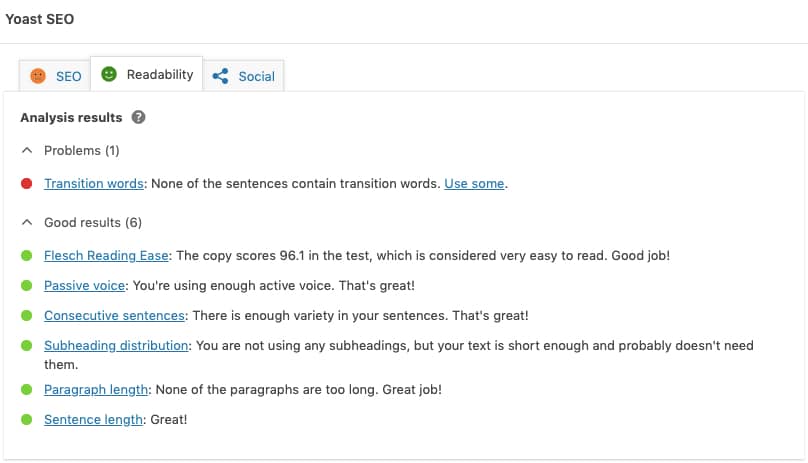
If anything is marked with a red or orange dot, make the recommended changes as best you can. These suggestions really do help your website rank higher in search (and make visitors more like to spend time reading your content).
Step 6: Create Your Content
Most websites include the same basic set of pages:
- Home: The page that greets your visitors.
- About: The page that tells your company’s story.
- Services/Products: The page that introduces visitors to your services or products (you may need more than one page depending on what you sell and how much content there is).
- Contact: The page that lets visitors know how to get in touch.
- Privacy Policy: The page that explains what kind of data your website collects and what you do with it.
There are other pages you might want to create, too. For example:
- Portfolio: The page that shows off samples of your work.
- Blog: The news feed where all of your blog posts or articles appear.
- Pricing: The page where you provide prices for your services and maybe even “Buy Now” options.
Regardless of which pages you need, you’ll have to go through the same steps to create and customize them:
Create a New Page
Go to your Pages menu.
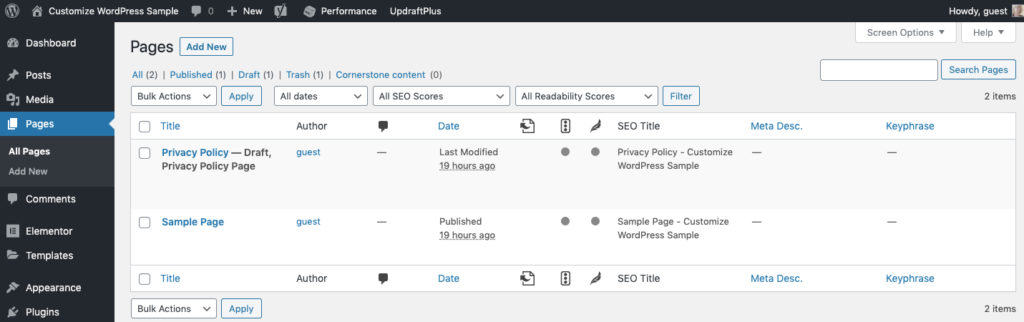
By default, WordPress will create a Sample Page and Privacy Page for you. You can delete the Sample Page. Hold onto the Privacy Page as you can customize the content and publish it once you’re done with everything else.
To create your first page (it’s usually best to start with the home page), click “Add New”.
On a side note, you can also set your website into maintenance mode, which prevents others from seeing your unfinished website.
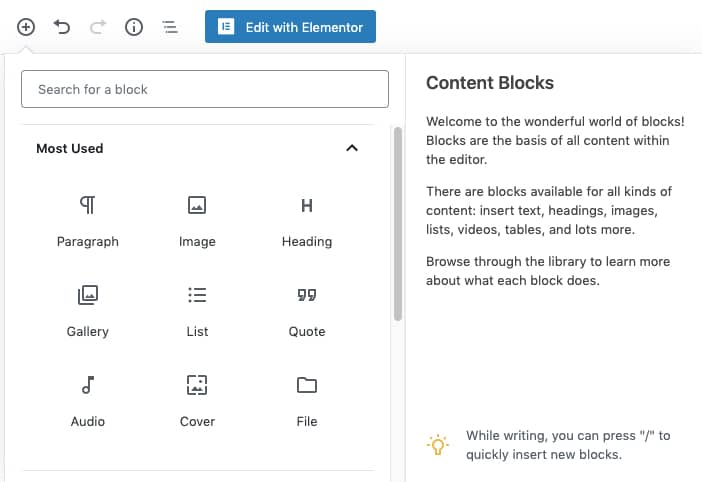
This is the WordPress block editor and its associated settings:
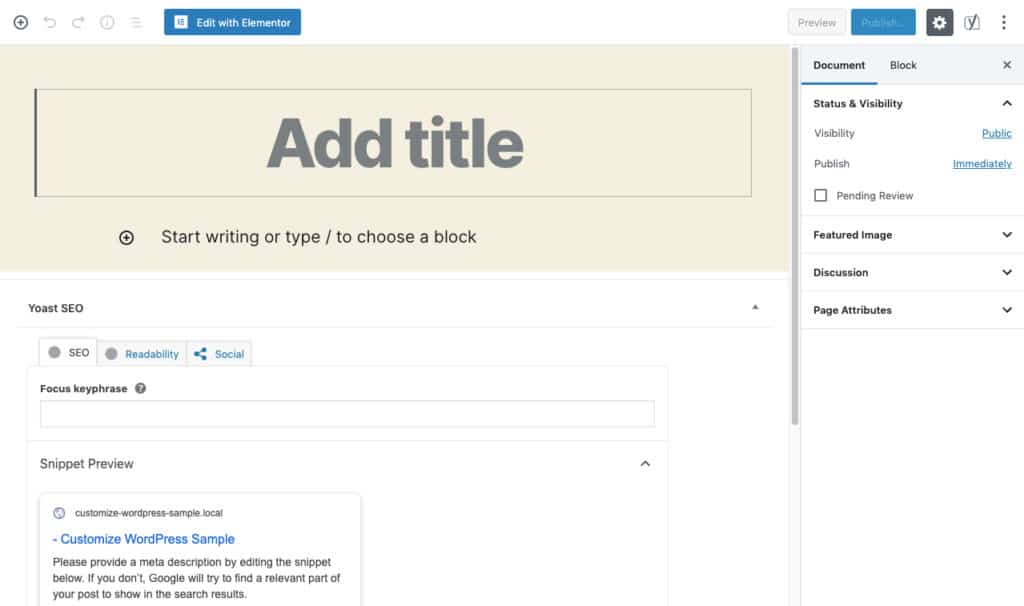
You can use this to build your web pages or you can use a page builder plugin. Adding content to the page is the same with each option.
Name the Page
First, give your page a name.
First, give your page a name.
Click “Save Draft” so that your page’s URL will auto-generate. (I’ll show you how to fix the home page so it doesn’t have a slug attached to it in just a bit.)
Create the Design and Layout
You have a choice here: create your page’s design and layout from scratch or use a template.
You have a choice here: create your page’s design and layout from scratch or use a template.
To build it from scratch, add each element one-by-one with a block. This isn’t the most time-efficient way to build a website though, so you should probably explore your template options before going that route.
Check your WordPress theme to see if it can help. Some of them come with premade page templates you can import into the site.
If your theme isn’t any help, you can use a page builder plugin to add full-page or block templates to fill in the gaps.
For example, let’s say you’re using Elementor and this is what you see when you open your new page:
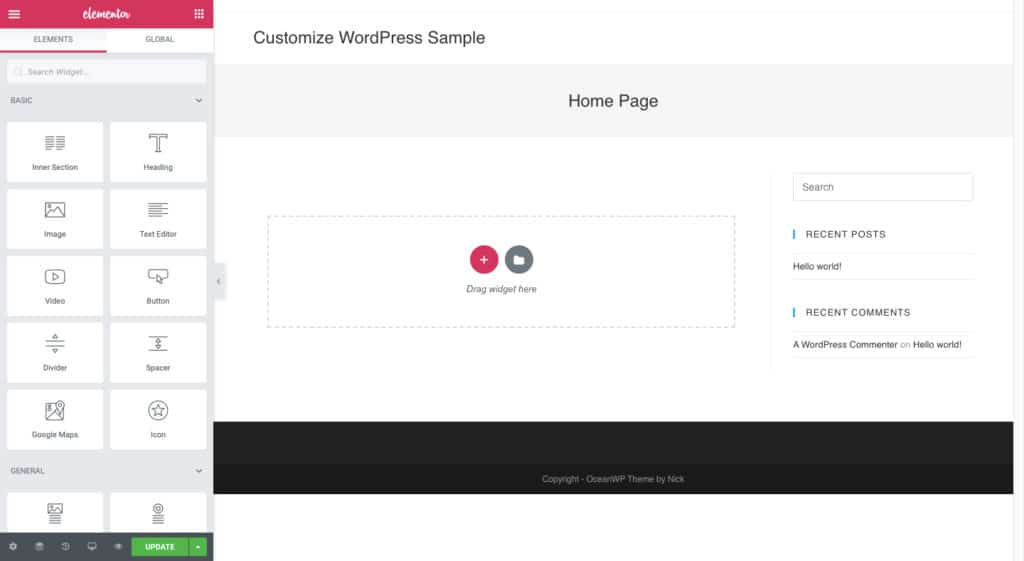
To replace the page with a template, click on the folder to access your templates:

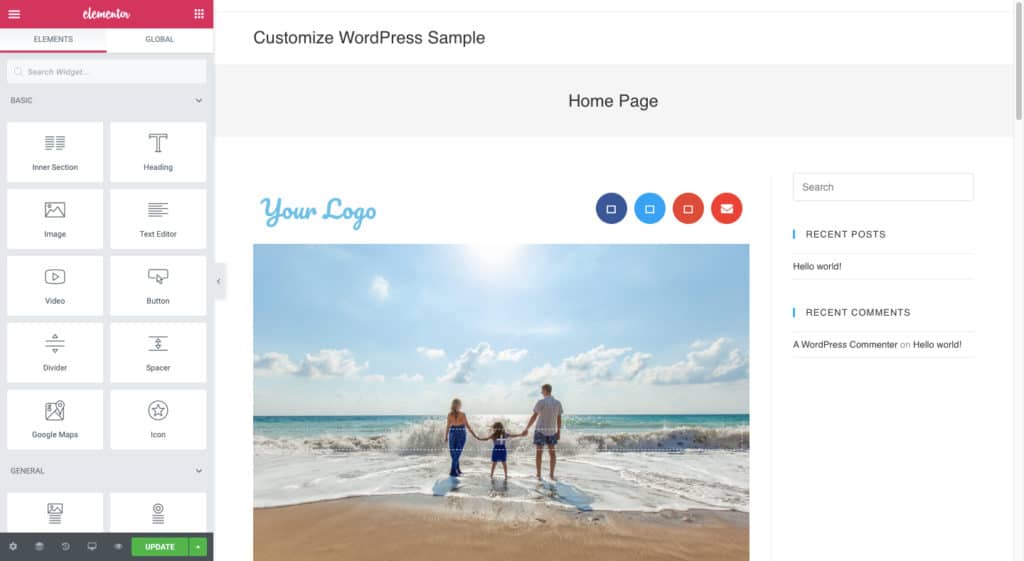
Find the template you want to use and click “Insert” to add it to the page:

Here’s what this particular example looks like when you add it to the page:
Customize the Layout
Let’s say you like the template you’ve imported, but you’re not happy with how it sits on the page.
Let’s say you like the template you’ve imported, but you’re not happy with how it sits on the page.
In the example above, for instance, you want to get rid of the “Home” page title banner as well as the sidebar. You won’t be able to do that on the actual page since they’re not elements you can drag and drop into place.
Instead, use the Settings widget (the gear icon) in the editor to the left:
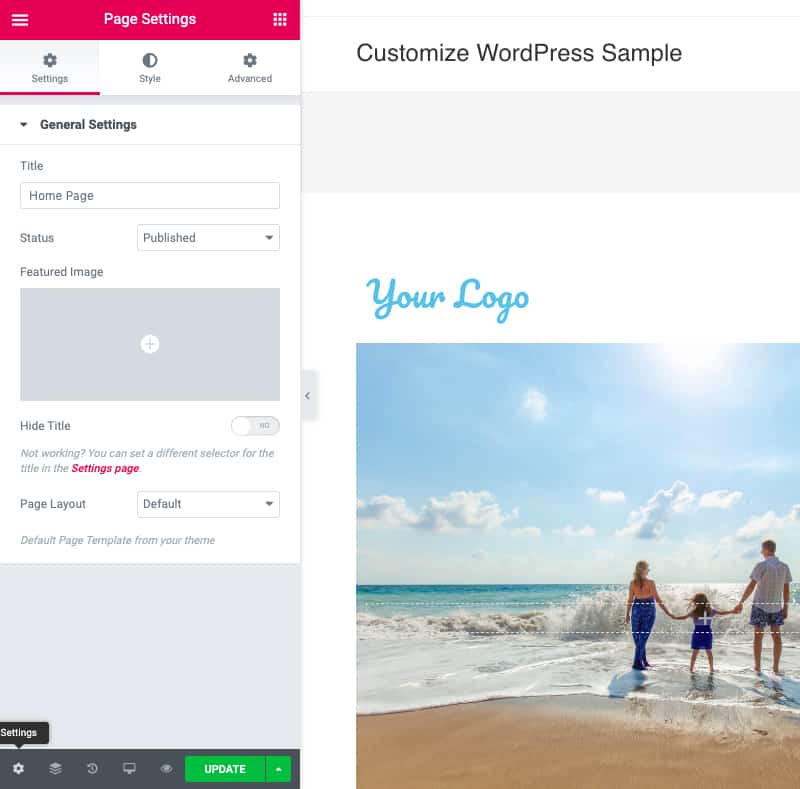
When you click “Hide Title”, it should remove the title bar from the top of the page. However, if you plan on hiding this bar on every page on the website, it’s best to configure this setting from the theme Customizer. That way, you only have to set it once.
To make better use of the space on the page, Elementor, in particular, provides you with options like “Fullwidth” and “Canvas” to stretch the design. Play around with these settings to find the layout and design that best suits your needs.
Again, you can always return to the Customizer to tweak any of the default theme settings you’re not happy with.
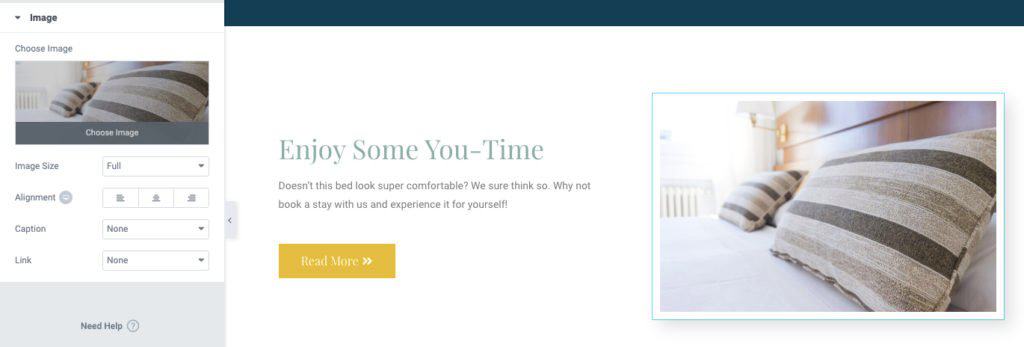
Customize the Content
Once you’re happy with the design of your page, you can customize the content. This includes all of the text as well as the images.
Once you’re happy with the design of your page, you can customize the content. This includes all of the text as well as the images.
To do this in any editor — WordPress’s block editor or a page builder plugin — just click on the block you want to customize and update it.
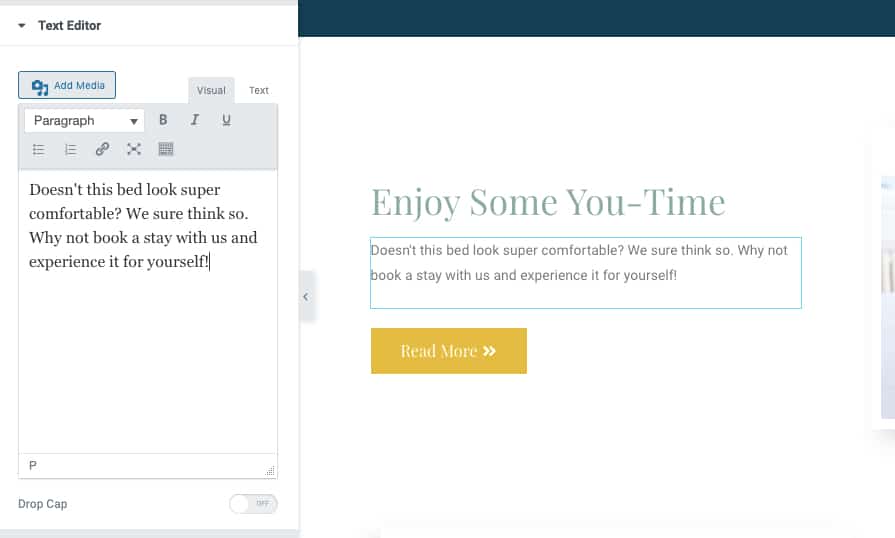
As you customize your content in the editor, it will reflect those changes in the preview of your website in real-time.
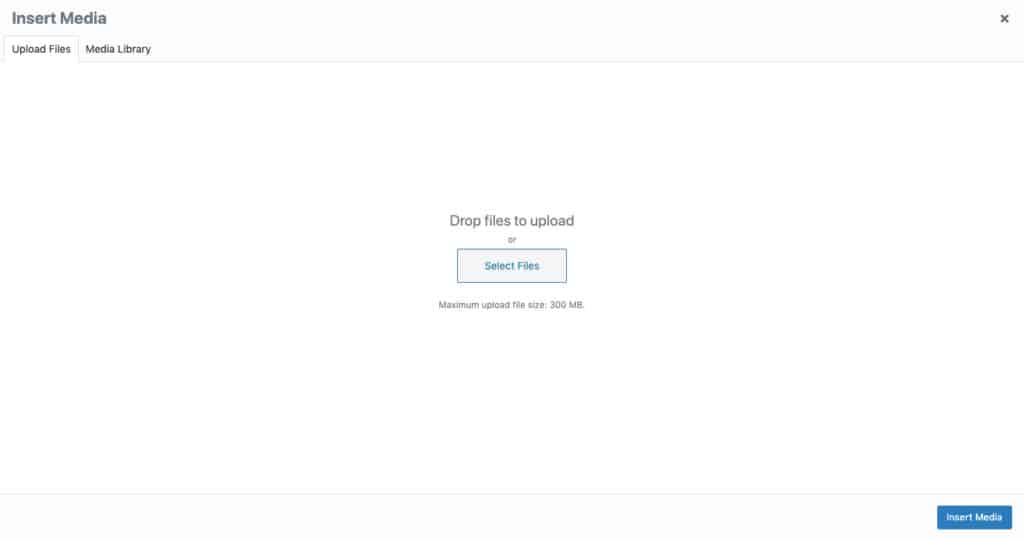
The same goes for updating media.
Whether swapping out an image or video for your own or adding something new altogether, you’ll have the option to upload media from your device or choose from something already in your library.
Add New Content
If you feel like something’s missing from your template, don’t fret. You can easily add your own blocks to premade designs.
If you feel like something’s missing from your template, don’t fret. You can easily add your own blocks to premade designs.
In a page builder plugin, look for a plus-sign in the part of the page where you want to add a new block:
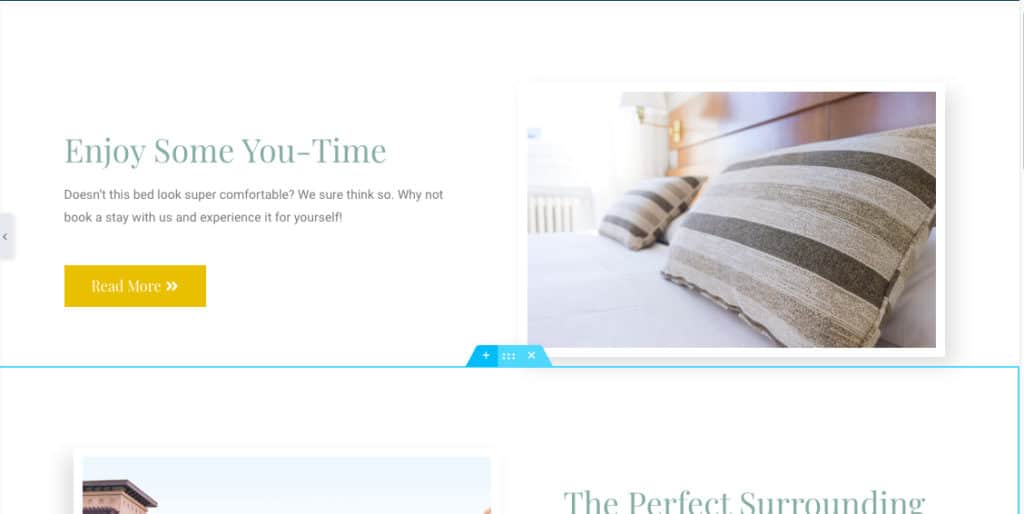
Then, find the block type you want to use and drag-and-drop it into the new space:
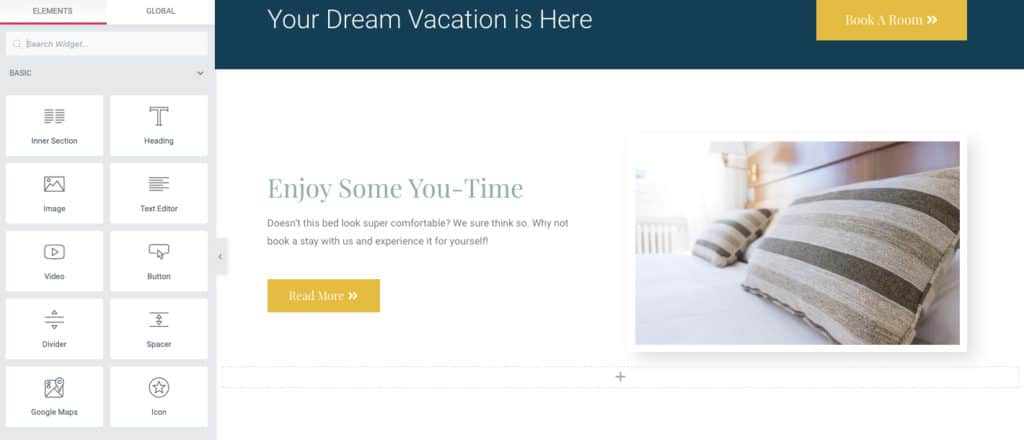
The WordPress Editor works similarly:
Find the plus-sign to add a new block or select one from the Blocks menu in the top-left. Click the one you want to add and then start customizing.
Update the Page Settings
You’ve already seen the Yoast widget at the bottom of the page. Make sure that if you have that plugin activated that you configure those settings before you publish your page.
You’ve already seen the Yoast widget at the bottom of the page. Make sure that if you have that plugin activated that you configure those settings before you publish your page.
Also, be sure to customize your page’s “Document” settings here:
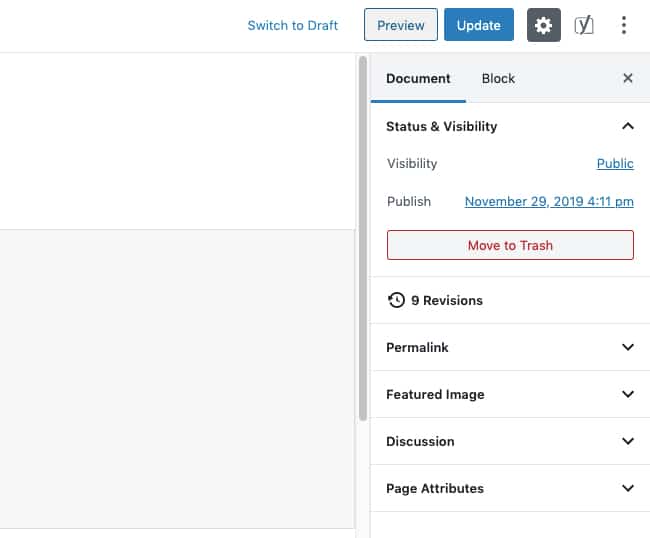
You can edit:
- The permalink (the page-specific link)
- The featured image (every page should have one so your blog feed summaries and social media promotions have both an image and description)
- Categories and Tags (for blog posts only)
When you’re done filling in all of the pertinent details, click the “Preview” button to review your website in a new browser window.
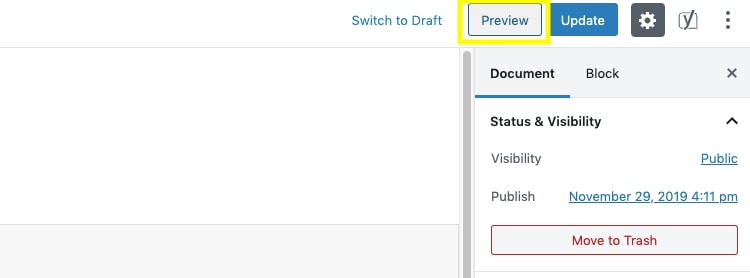
This gives you a chance to see your web page in real-time before you publish it (or any changes you’ve made to an existing page).
If you’re happy with it, click the “Publish” button and your web page will go live.
Note: the page won’t be added to your menu just yet. You’ll take care of that before this process is done.
Rinse and Repeat
Repeat this process until all of your web pages have been completed. When they’re published, you can move on.
Repeat this process until all of your web pages have been completed. When they’re published, you can move on.
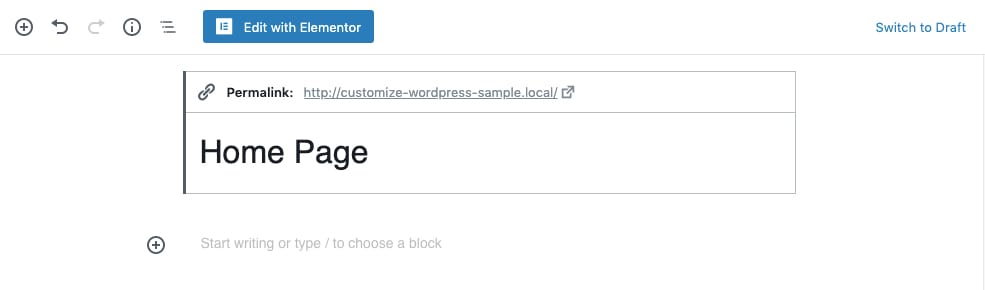
Set the Home Page
One last thing:
One last thing:
You want your home page to be located at https://yourdomainname.com. Not at something like https://yourdomainname.com/home.
To fix this, go to Settings > Reading.
Under “Your homepage displays”, select “A static page”:
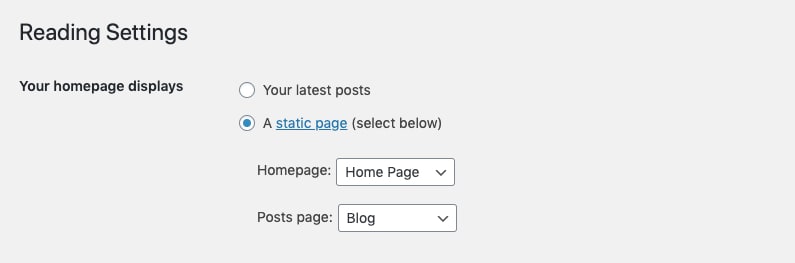
You can now choose the Home page (and Blog page, if you created one) from your published pages list.
Save Your Changes. This will set your Home page as the front page of your website and will start populating the Blog with any posts you write.
Step 7: Build a Contact Form
With your key pages in place, the next step is to add a contact form so that visitors and interested prospects can get in touch.
This tutorial will show you how to create a contact form from start to finish using the Contact Form 7 plugin. If there’s a different contact form you have your eyes on, scroll to the bottom of the post for recommendations.
As far as best practices for adding a custom contact form to WordPress, here are some things to keep in mind:
Don’t hide it.
Place the form in an easy-to-find location. Your Contact page, for sure, needs one. You may also want to add one to the sidebar of your blog or to the bottom of the home page.
Place the form in an easy-to-find location. Your Contact page, for sure, needs one. You may also want to add one to the sidebar of your blog or to the bottom of the home page.
Only include fields you need.
With everyone so well-attuned to privacy concerns on the web these days, you don’t want to go asking for information that’s irrelevant to your purposes.
With everyone so well-attuned to privacy concerns on the web these days, you don’t want to go asking for information that’s irrelevant to your purposes.
Don’t forget about the follow-up messages.
After your contact form is filled out, two people are going to receive follow-up messages.
After your contact form is filled out, two people are going to receive follow-up messages.
The person who filled out the form will get a confirmation message. Usually, it appears in place of the form after it’s been submitted.
By default, your form will send pre-written messages to the user:
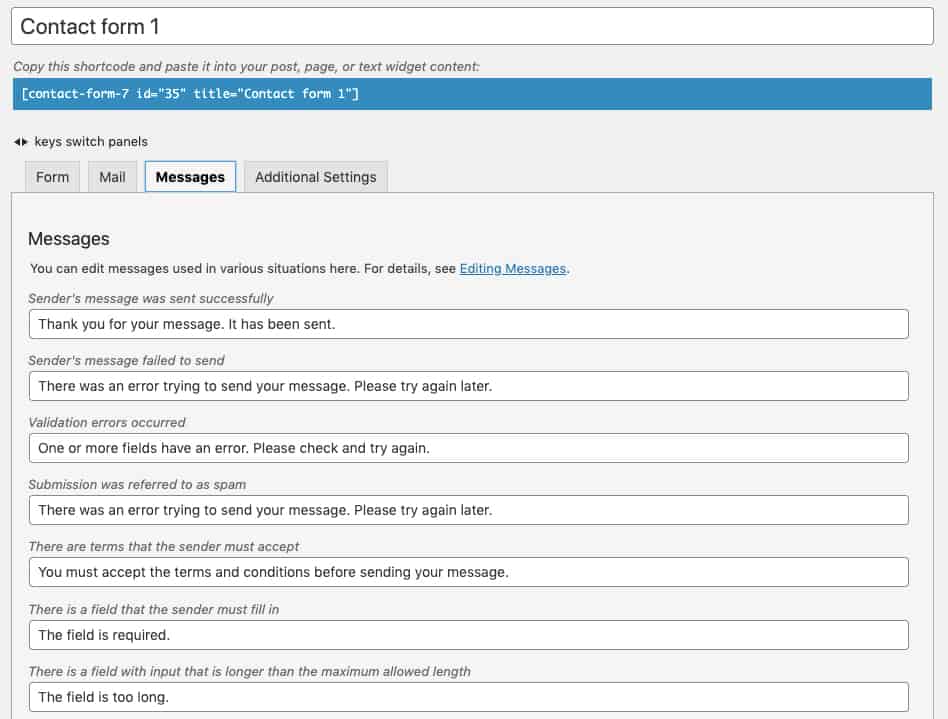
Feel free to give this a personal touch by customizing your messages.
Don’t forget about the message you receive as a follow-up. Yours will come as an email:
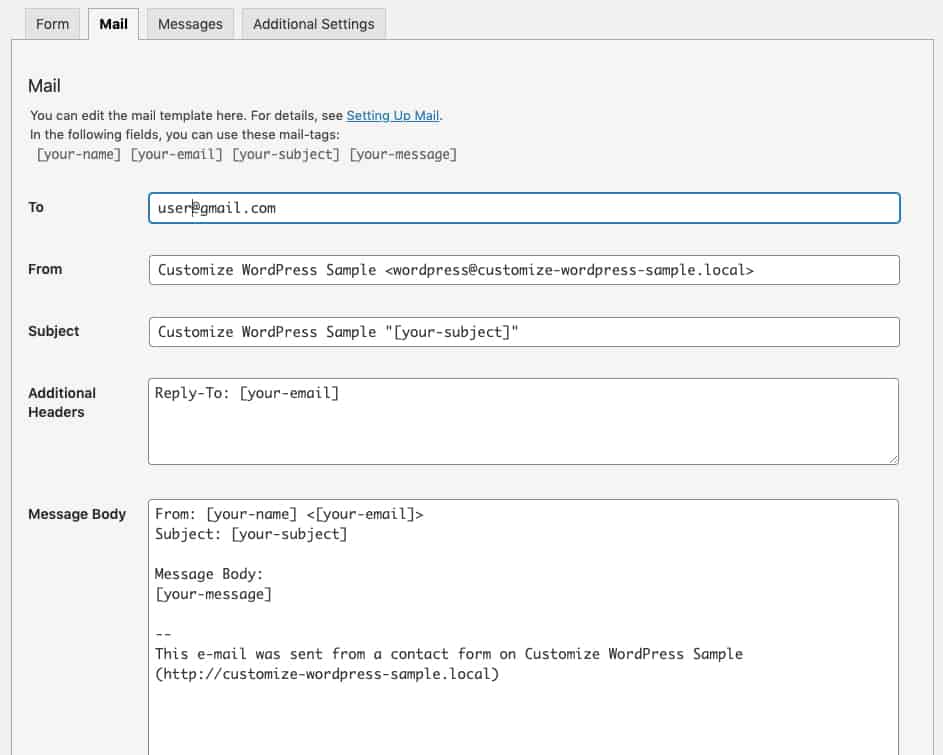
A subject line like “Your Domain Name ‘[User’s Subject Line]’” isn’t great and it might send your contact form emails straight to spam. If you want to receive these contact form submissions without fail, customize the details in the subject line as well as the body of the message.
After you’ve embedded the contact form, visit your website and fill it out yourself. Make sure everything works as intended — especially if you set required fields. Then, check the follow-up messages on the site and in your email inbox to make sure all is good.
Step 8: Add Widgets
When you worked through your Customizer settings earlier, you may have noticed that there was a section for “Footer” or “Widgets”.
At the time, we asked you to leave them alone. That’s because it doesn’t make much sense to fill in these small blocks of content until you have the rest of the pieces of your website put together.
As for what widgets are, think of them as the blocks for miscellaneous sections of your website. Mainly, widgets go in the footer, sidebar, and sometimes the home page.
Although you could return to Customize to configure your footer, your best bet is to do all the work under Appearance > Widgets:
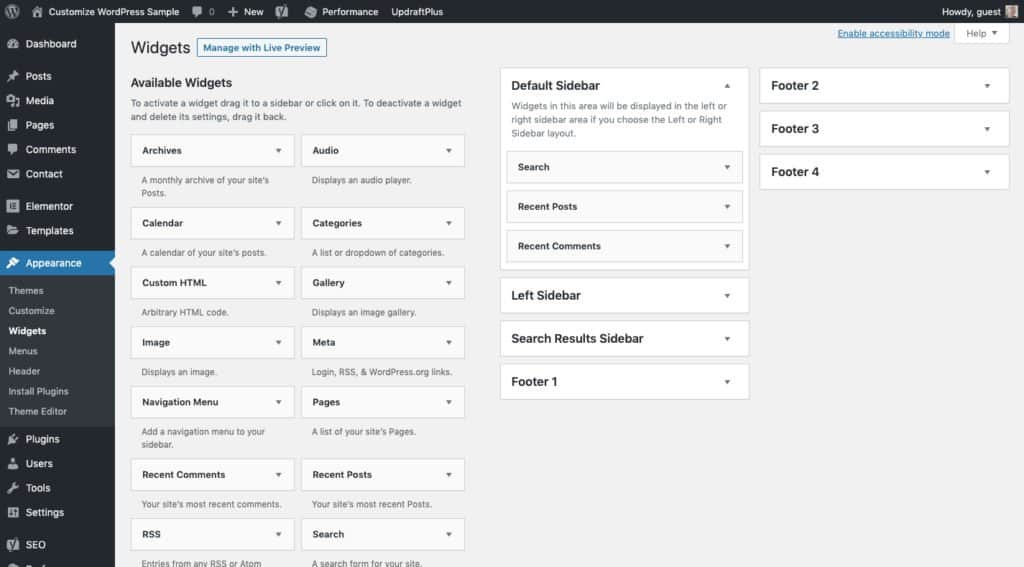
This way, you can tackle all of your widgets at once. In addition, you have a much clearer view of what kind of widget spaces are available on your website to fill (this will differ from theme to theme, by the way).
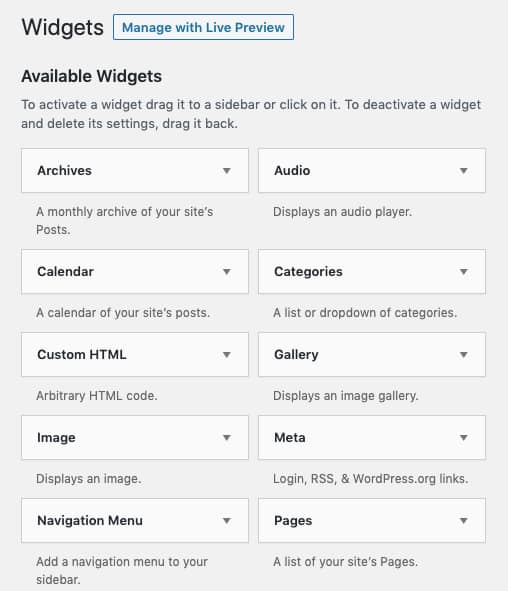
On the left side of the screen are your available widgets:
On the right side of the screen are the available widget placements:
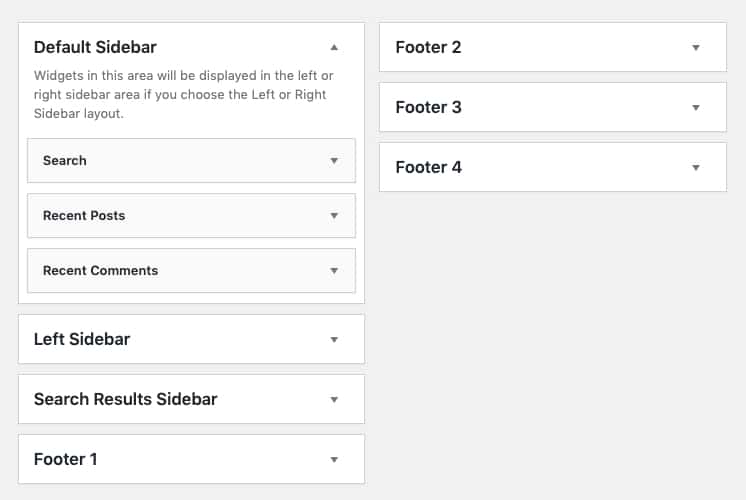
Your theme may have already pre-populated some of these widgets with content (usually, this is the case for the footer).
Review any of the widgets currently in place. If you’re happy, keep them where they are.
If you want to customize the order in which they appear — like moving a list of Recent Posts above the Search bar — simply drag-and-drop the widget block to where you want it to appear.
And if you want to customize the content of the widget, click on the block:
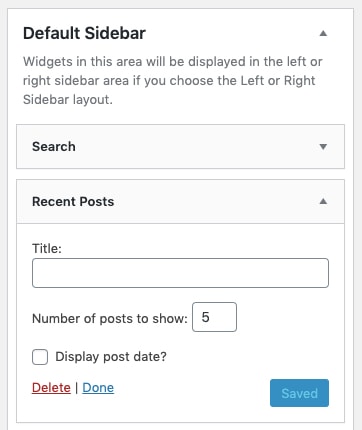
In this example, you can add or change the title that appears above the Recent Posts list. You can also update how many posts will be shown at a time. If you want, you can add the publication date, too.
Now, you don’t need to fill any of these widgets if you don’t want to. However, if you want to take advantage of this extra space WordPress gives you, take care of filling in all of your widgets before moving on.
Step 9: Set Up the Menu
Now that all of your content is in place, you just need to create a navigational menu to show it off.
You’ll find this under Appearance > Menus:
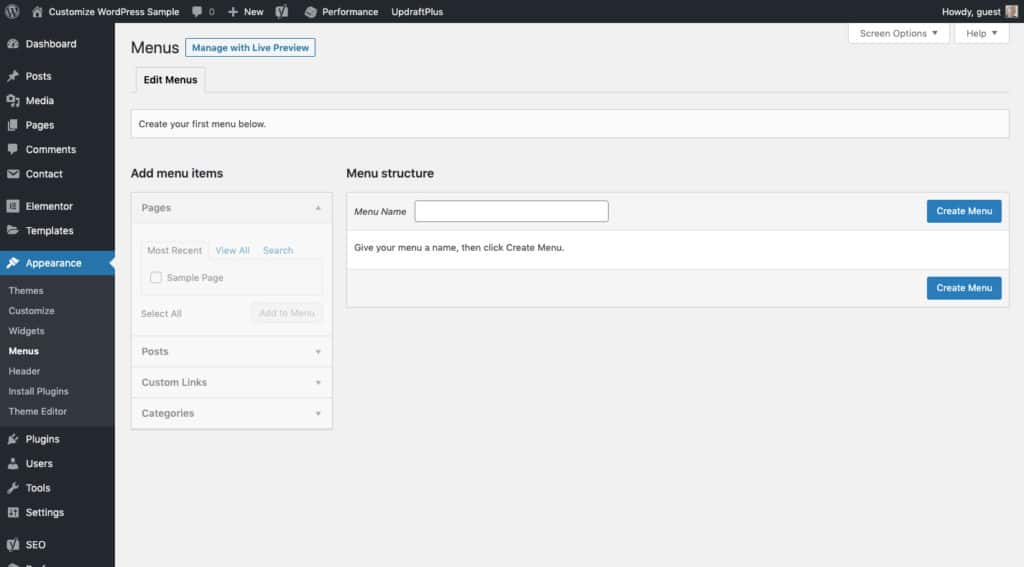
On this page, you can create as many menus as your website needs. For most of you, you’ll only need one.
Name the Menu
There’s no need to over-complicate this as you’re the only one who will see the menu name. Just call it something like “Main Menu”.
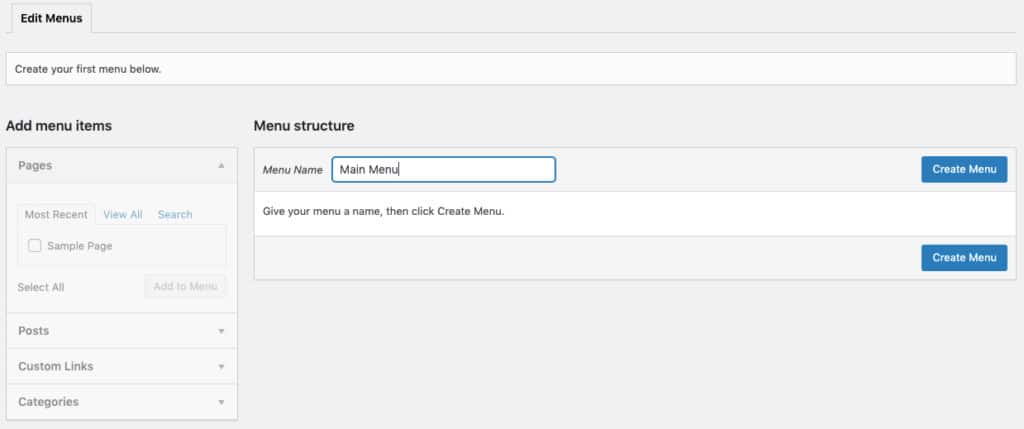
Then, click “Create Menu”.
Choose the Menu Placement
Next, indicate where you want the menu to go.
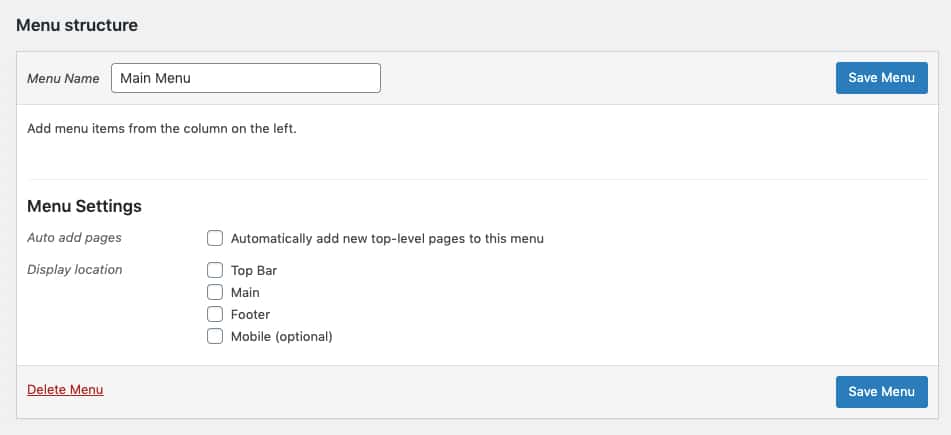
If you create a menu for the footer (which is rare) or a different one for mobile (which you may decide to do down the line), you’ll configure that here. For now, just choose “Main”.
Keep the “Automatically add new top-level pages to this menu” unchecked. Even if you automate that piece of it, you’ll still have to come back to this page to update the order. You might as well wait to place a page in the menu when you can choose the right spot for it.
Add Pages to the Menu
To add your pages to the menu, click the checkboxes beside them. Then, click “Add to Menu”.
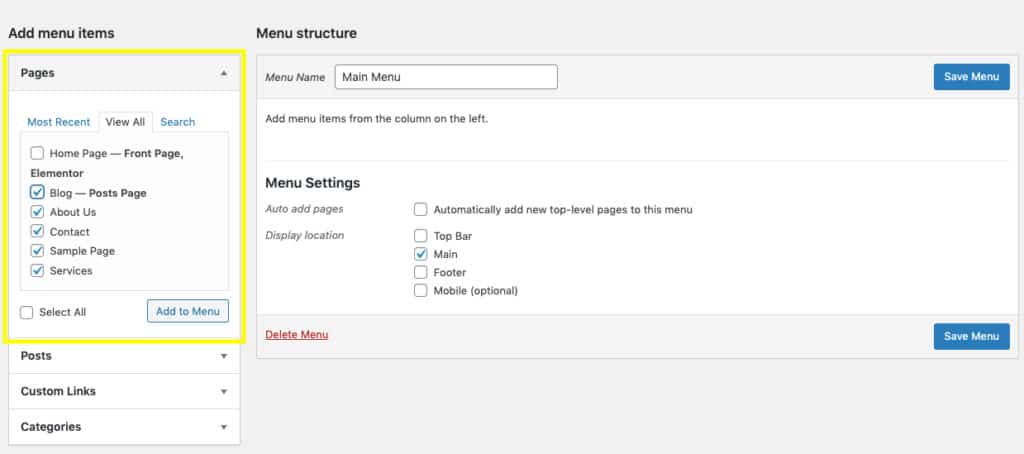
You can add more than just pages, too. If you have blog posts, categories, products, or other links you want to add, do that here.
Your pages will land over here:
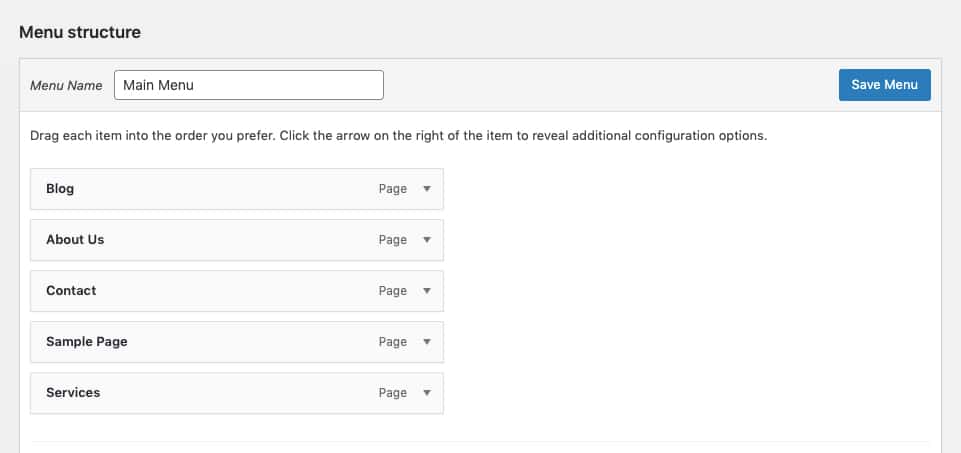
To change the order in which they appear, drag and drop them into place:
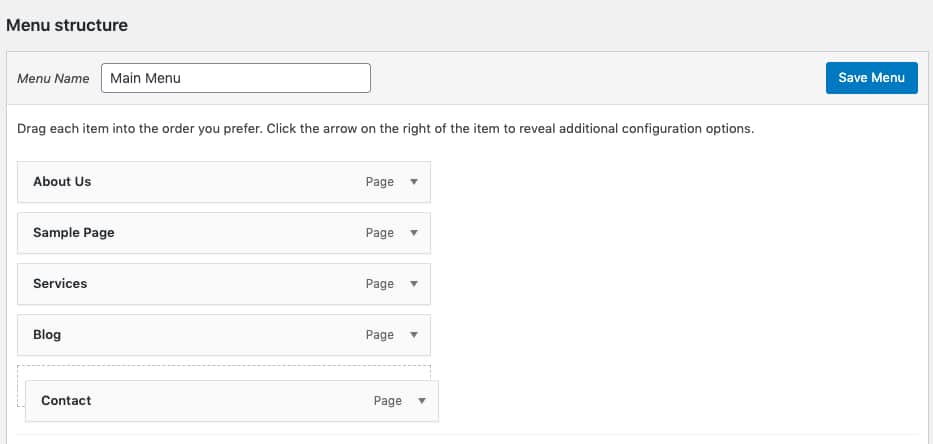
If you want your pages to all to appear in the top-level of your navigation, make sure they’re left-aligned. To create sub-pages for top-level pages, drop them beneath with an indent like this:

Customize Menu and Pages
Once your pages are in place, open each one and make sure all of the settings are customized to your liking.
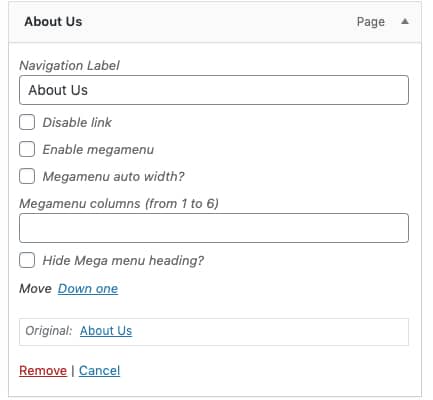
You can:
- Change the page name.
- Disable the link if you don’t want the top-level to be clickable.
- Enable a megamenu if you’d like to place a large menu with multiple layers beneath a single page name.
For the most part, you probably won’t need to adjust these settings. However, it’s good to know they’re here in case you do. This is also where you can remove pages from your menu.
Step 10: Connect to Google
Once your website has been built and customized to your liking, there’s one final thing to do: connect it to Google.
Set Up Google Analytics
With or without a connection to Google Analytics, Google and other search engines will still be able to crawl and index your website. What you gain, then, is the ability to see what kind of data Google has collected from your website with regards to traffic and performance.
This tutorial will walk you through the steps to create a Google Analytics account and then connect it to your website. You can do this with the help of a WordPress plugin or you can do it manually with code.
Once Google Analytics is ready to go, you’ll be able to monitor your website’s traffic patterns and make data-based decisions about the future of your website’s design, content, purpose, and so on.
This isn’t the only Google tool your website should be connected to though.
Set Up Google Search Console
Google Analytics provides you with data about how visitors interact with your website. Google Search Console, on the other hand, provides you with data about how visitors encounter your website everywhere else on the web.
If you have a Google Analytics account already, setting Search Console up is easy.
Your next step is to connect the Google Search Console.
Your next step is to connect the Google Search Console.
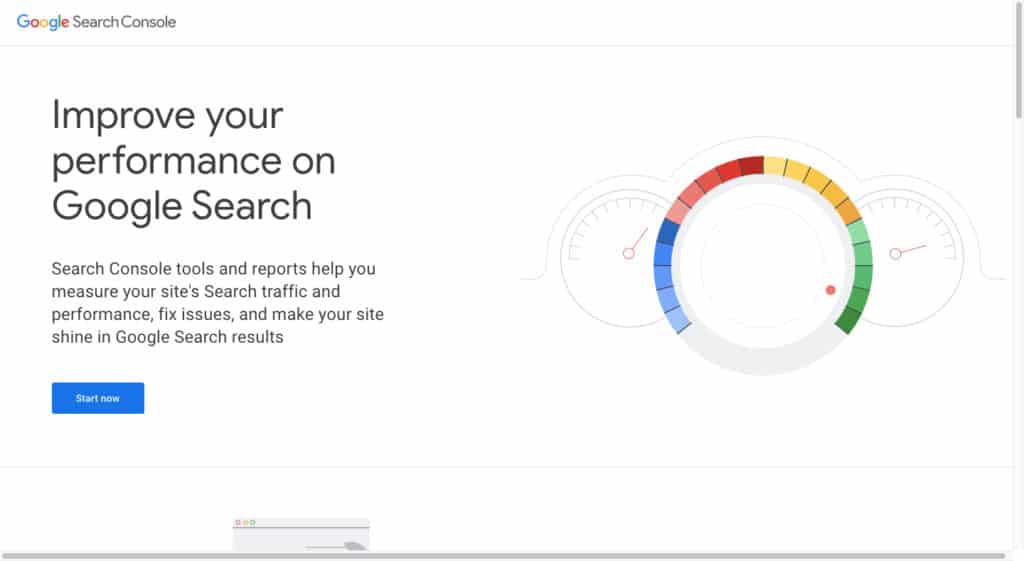
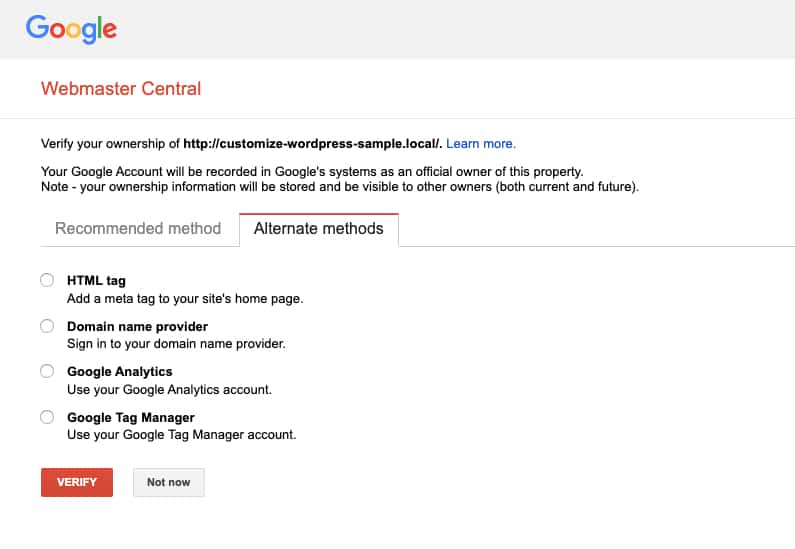
Go to the Search Console website and click “Start Now”. It’ll take you through the quick setup process and ask you to verify your ownership of the account using a number of options. Google Analytics is one of the easiest ways to do this, so take that option if you prefer.
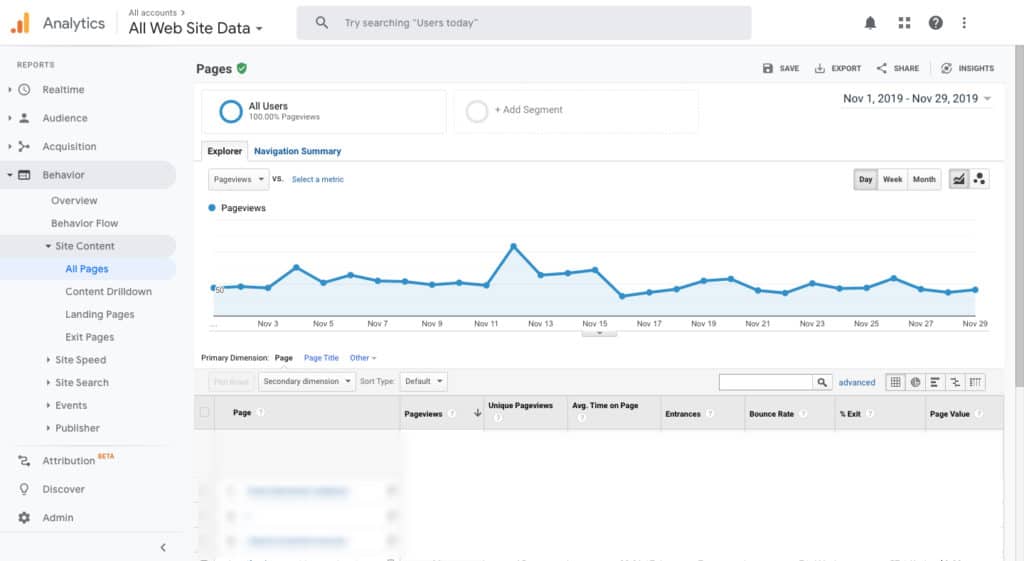
It’s also important to establish this connection from Google Analytics’ side. You’ll find this setting under Admin > Property > Property Settings:
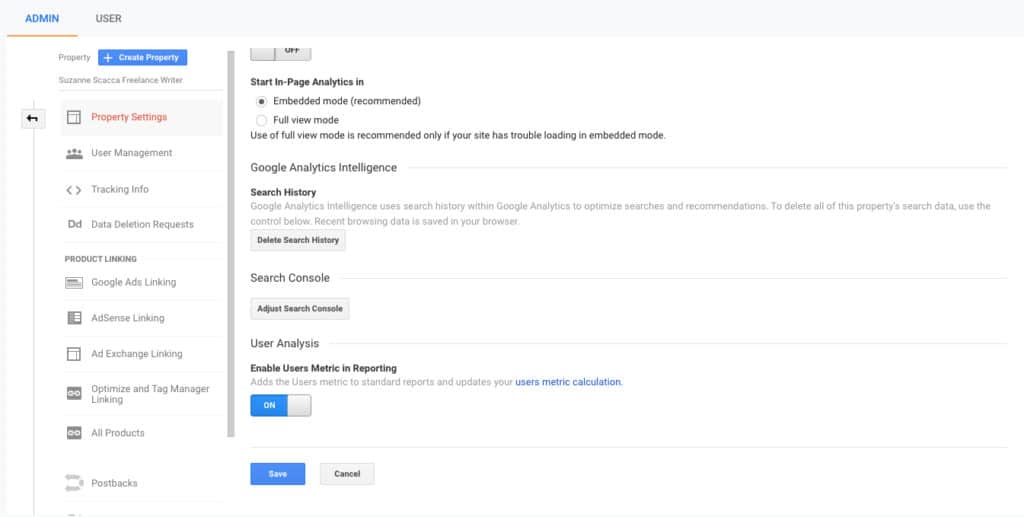
You should see your Search Console account listed as an option. Select it and connect it to Google Analytics so you can start pulling in some of that search data under your Acquisition report:
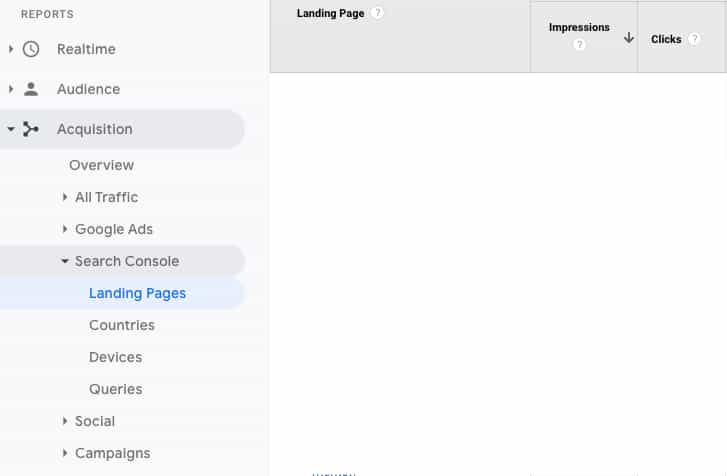
Or you can always just log into Google Search Console itself to get deeper insights into what’s going on with your website in search:
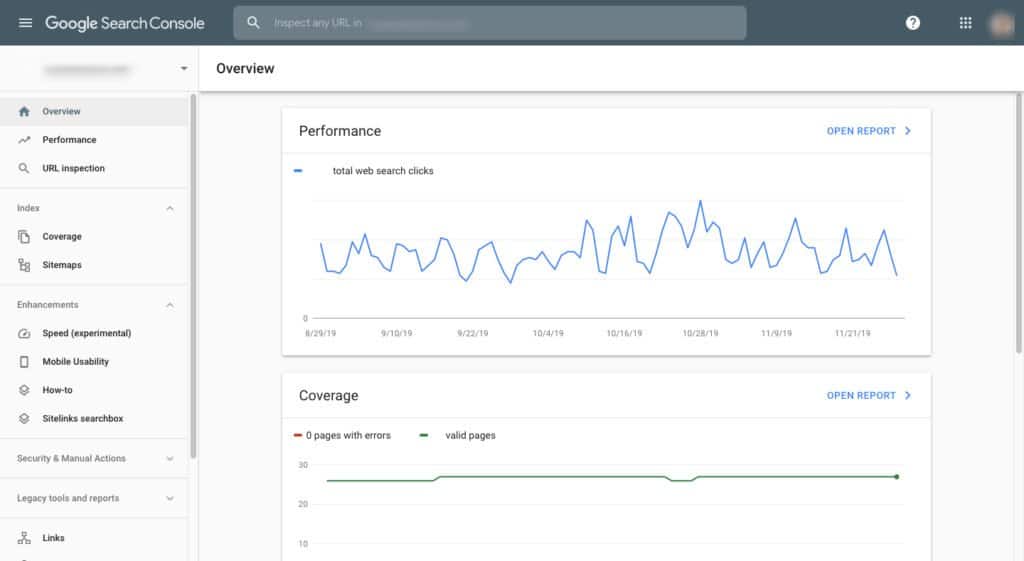
You can learn things like:
- How many clicks and views your website and each individual page gets in Google — in web, image, and video searches.
- How many clicks and views come from users on desktop, tablet, and mobile.
- What the average rank is for the pages of your site.
- What the top search queries are for your website.
- What kinds of mobile usability, security, or speed issues your website has (if any).
- Which websites have the most links pointing to your website.
- How well you’re handling internal linking within your own site.
If you take some time to get to know Google Search Console, you’ll be able to refine your search optimization strategy in WordPress (and beyond) for a better showing in search results.
Send Your Sitemaps to Google
The last thing to do with Google Search Console is to upload your sitemaps. This way, you can create a direct link between WordPress and Google, telling Google where to find the content on your website.
One of the nice things about using the Yoast SEO plugin is that your XML sitemaps are automatically generated. You can find a link to them under General > Features:

Click the question mark to get the link to your sitemaps. You can now return to Google Search Console.
Open the Sitemaps tab:
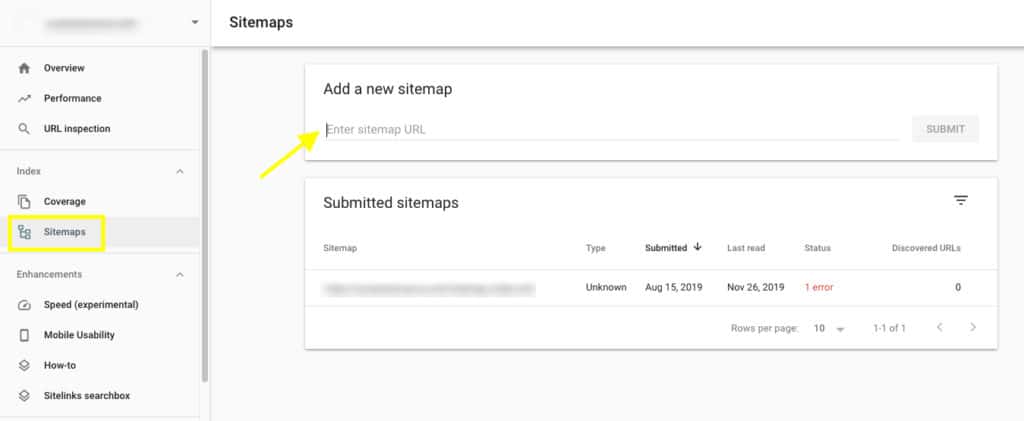
For every sitemap link, you got from your WordPress website, enter it into the “Add a new sitemap” bar. Google Search Console will then process the sitemap and all the page links within it. The next time Google’s bots get around to crawling the web, your site’s pages will get picked up.
Since your sitemap automatically updates whenever you add new content to your site, you won’t have to worry about Google missing out on important updates as it now has your sitemap in Search Console.
Wrap-Up
One of the great things about building a website with WordPress is that you have total control over how you build it and how much customization goes into it. As you can see, there’s a lot to customize in WordPress, from your theme to the layout of the navigation. You can even customize how and where your Google traffic data is presented to you.
Bottom line: if you’re going to make the choice to use WordPress, take advantage of everything it has to offer. There’s so much you can do with this content management system to create a unique and powerful website you’ve always wanted.
Comments
Post a Comment